Are you tired of skyrocketing electricity bills and power outages disrupting your daily life? Imagine having a reliable power source that’s not only eco-friendly but also saves you money in the long run.
Building your own DIY solar generator could be the perfect solution. It’s not as complicated as it might sound, and you don’t need to be a technical expert to get started. In this guide, you’ll discover step-by-step instructions on how to create a solar generator from scratch, empowering you to harness the sun’s energy whenever you need it.
Dive in and unlock the secrets to energy independence that could transform your home and lifestyle.
Benefits Of Diy Solar Generators
DIY solar generatorscan save money. They use the sun’s energy, which is free. You don’t have to pay for electricity. The sun shines and your generator charges.
These generators are good for the planet. They use clean energy. No pollution is made. This helps the air stay fresh and clean.
Building your own generator can be fun. You learn new skills. It’s like a cool science project. You can work with your family. Everyone can help and learn.
Having a solar generator is handy. It works when there is a power cut. You can use it outside. Camping or in the garden, it can be useful.
Essential Components
Solar panels are the heart of your DIY solar generator. They capture sunlight and turn it into electricity. Choose panels that match your energy needs. Look for panels with good efficiency. They should be durable and weather-resistant. Proper placement ensures maximum sunlight exposure.
Batteries store the energy produced by the solar panels. This energy can be used when the sun isn’t shining. Lead-acid and lithium-ion are common battery types. Lithium-ion batteries are lighter and last longer. Make sure your battery has enough capacity for your needs.
The charge controller keeps the battery from overcharging. It regulates the voltage and current coming from the solar panels. This ensures the battery lasts longer. Choose a controller that matches your system size. It should be easy to install and use.
An inverter changes stored energy into usable electricity. It turns DC power from the battery into AC power. AC power is what most home appliances use. Choose an inverter that can handle your power needs. Make sure it is safe and reliable.
Wiring and connectors link all components together. Use high-quality wires for safety and efficiency. Make sure the wires are the right size for your system. Connectors should be sturdy and weatherproof. Proper connections ensure your system works well.
Planning Your System
Begin by listing all the devices to power. Note how long each runs daily. Check the wattage of each device. Add these numbers to find total energy usage. This helps know how big your solar generator needs to be. Remember, more devices mean more power.
Calculate power output by understanding solar panel ratings. These are usually in watts. Multiply the panel’s wattage by sunlight hours per day. This gives daily power output. Check if this meets your energy needs. Adjust the number of panels if needed.
- Solar Panels:Pick panels with right wattage.
- Battery:Choose a battery to store power.
- Charge Controller:Protects battery from overcharging.
- Inverter:Converts power to usable form.
Ensure all components fit well together. This ensures a smooth working system.
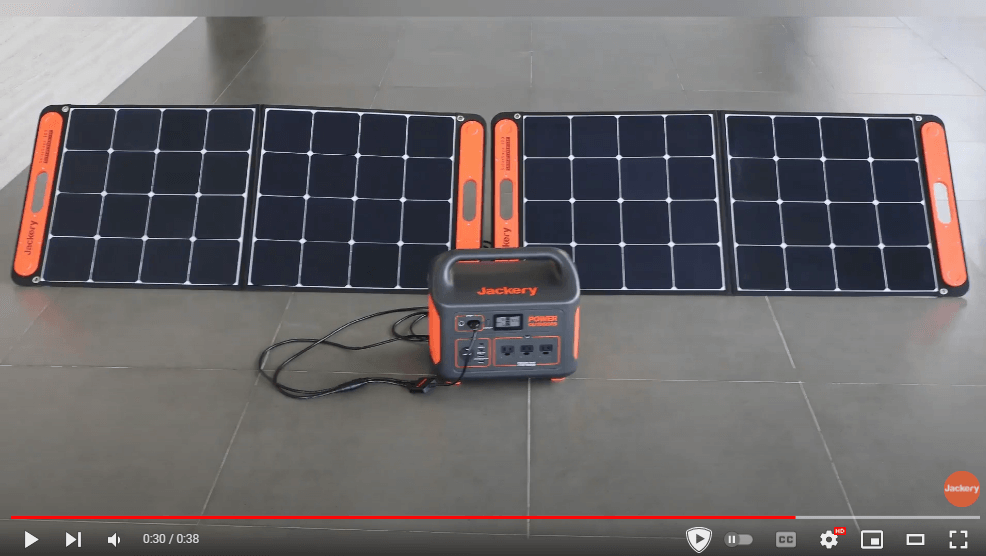
Credit: www.jackery.com
Assembling The Solar Panels
Assembling the solar panels involves connecting individual panels using cables and brackets. Ensure each panel faces the sun for maximum efficiency. Secure the setup to withstand various weather conditions.
Positioning For Maximum Sunlight
Solar panels need sunlight to work well. Find a spot that gets sun all day. Avoid areas with trees or buildings that block the sun. Angle the panels towards the sun for best results. Morning and afternoon sun are most important. Use a compass to find the best direction.
Mounting Options
Solar panels need strong mounts. Roof mounts are common. Ground mounts are also good. Choose the one that works for your space. Make sure the panels are secure. Use brackets for extra safety. Wind can move panels if not mounted well.
Installing The Battery Storage
Installing the battery storage requires a stable and ventilated location. Secure the battery and connect it to your solar panels. Ensure proper wiring to safely store generated energy for later use.
Selecting Battery Type
Choose batteries that store energy well. Lithium-ion batteries are popular. They last long and charge fast. Lead-acid batteries are cheaper but heavier. Think about your space and budget. Capacity matters. Bigger batteries store more power. But they cost more too.
Safety Precautions
- Wear gloves to protect your hands.
- Use goggles to shield your eyes.
- Keep batteries away from water.
- Ensure proper ventilation in the room.
- Check for leaks regularly.
- Don’t touch battery terminals with metal objects.
Connecting The Charge Controller
Connect the charge controller to manage power flow between solar panels and batteries. Ensure wires match positive and negative terminals. This step protects batteries from overcharging and deep discharging.
Purpose Of Charge Controller
The charge controllerkeeps the battery safe. It stops the battery from getting too much charge. The controller also stops the battery from draining too much. This helps the battery last longer. It is an important part of the solar generator.
Installation Steps
- Place the charge controller near the battery.
- Connect the solar panel to the controller.
- Use the right cables for connections.
- Attach the battery to the controller.
- Check all connections are tight.
- Ensure the controller is working properly.
Setting Up The Inverter
The inverter changes solar powerfrom DC to AC. This lets you use it in your home. Many home devices need AC power. Your inverter must be big enough for all your devices. Always check its wattage before using.
- Choose a safe, dry spot for the inverter.
- Connect it to the solar panels with care.
- Ensure all wires are secure and tight.
- Read the manual for safety tips.
- Test the system before using it for real.

Credit: solartiger.in
Wiring And Connections
System integrationis key in building a DIY solar generator. Connect the solar panelsto the charge controller. Use wires with the right thickness. This prevents overheating. From the charge controller, connect to the battery. Ensure connections are tight. Loose wires can cause problems. Finally, link the power inverterto the battery. This changes DC to AC. Now, your devices can use the energy.
Avoiding common mistakesis important. Check your connections often. Look for loose wires. Use the right size of battery. A small battery won’t store enough power. Double-check the polarity. Wrong polarity can damage parts. Ensure the solar panels face the sun. This maximizes energy capture. Keep the system clean. Dust can block sunlight. Regular checks help keep everything working well.
Testing Your Solar Generator
Start with checking the solar generator’s power output. Use a simple multimeter to measure voltage. Make sure it’s within the expected range. Next, connect a small device like a lamp. See if it powers on without issues. This shows the generator works properly.
Inspect all connections and wires. Ensure they are tight and secure. Loose connections can cause problems. Listen for unusual noises from the generator. Strange sounds might indicate a problem.
- Check if the solar panel is clean. Dirt can block sunlight.
- Ensure all cables are connected properly. Mistakes can disrupt power flow.
- Test the battery. Make sure it holds a charge.
- Reset the system if it stops working. A simple reboot can fix issues.
- Consult the user manual. It may have solutions for specific problems.
Maintenance And Care
Inspect your solar generator every month. Look for any loose wires. Check for any damaged parts. Make sure all connections are tight. Clean the solar panels with a soft cloth. Dust and dirt can block sunlight. Keep them shiny for best results.
Technology changes fast. New parts may work better. Upgrading can make your generator last longer. Look for a better battery. It can store more power. Newer inverters may work more efficiently. Always check the compatibility of new parts. Read the manual before making changes. Ask an expert if unsure.

Credit: www.youtube.com
Frequently Asked Questions
Is It Cheaper To Build Your Own Solar Generator?
Building your own solar generator can be cheaper initially. DIY projects save on labor costs. Choosing affordable components and using online guides can reduce expenses. However, quality may vary, and professional systems often offer better efficiency and warranty. Consider long-term benefits and personal expertise before deciding.
Can I Build My Own Solar Generator?
Yes, you can build your own solar generator. Gather solar panels, a battery, charge controller, and inverter. Connect these components carefully. Ensure proper wiring and safety measures. Use quality parts for efficiency and durability. This DIY project helps reduce energy costs and supports sustainability.
How Long Will A 1000 Watt Solar Generator Run A Refrigerator?
A 1000-watt solar generator can run a refrigerator for about 8-10 hours. This depends on the refrigerator’s wattage and battery capacity. Ensure efficient power management and check the fridge’s energy usage for precise calculations.
What Can A 3000 Watt Solar System Run?
A 3000 watt solar system can power essential appliances like refrigerators, lights, fans, and small electronics. It supports energy-efficient devices and can run a small air conditioner for limited hours. Its capacity depends on sunlight availability and energy consumption patterns.
Conclusion
Building a DIY solar generator is a rewarding project. It helps save on energy costs. You also contribute to a greener planet. The process is straightforward with the right tools. Start small, gain confidence, and then expand. Solar energy is renewable and sustainable.
It powers homes while reducing carbon footprints. Embrace this eco-friendly innovation. Enjoy the benefits of clean energy. Share your knowledge with others. Inspire them to try solar power too. Together, we can make a difference. Start your DIY solar journey today.
Enjoy the satisfaction and savings it brings.