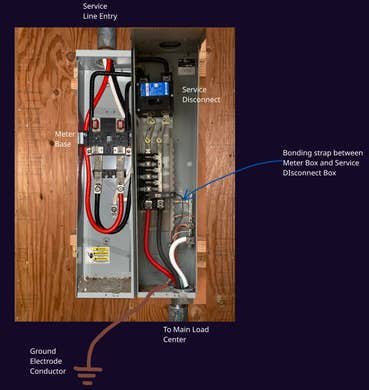
Picture this: a storm rolls in, the power flickers, and you’re counting on your generator to keep the lights on. But what if your transfer switch contacts aren’t working properly?
Knowing how to check them can save you from a frustrating night in the dark. In this guide, we’ll walk you through the process in simple steps, ensuring your peace of mind. You’ll discover how easy it is to safeguard your home’s power system and gain confidence in your backup plan.
Ready to ensure your power stays on when you need it most? Let’s dive in!
Credit: www.electriciantalk.com
Tools Needed
Having the right toolsis key for checking transfer switch contacts. Use a multimeterto measure voltage and continuity. A screwdriver sethelps open the switch panel safely. Needle-nose pliers assist in handling small parts.
Wear safety gearto protect yourself. Use insulated glovesto avoid electric shocks. Safety glasses shield your eyes from sparks or debris.
| Essential Equipment | Purpose |
|---|---|
| Multimeter | Check voltage and continuity |
| Screwdrivers | Open switch panel |
| Needle-nose pliers | Handle small parts |
| Insulated gloves | Protect from electric shocks |
| Safety glasses | Protect eyes from sparks |

Credit: forumautomation.com
Preparing The Transfer Switch
Always turn off the main powerbefore working on a transfer switch. This step is crucial for safetyto avoid electric shocks or damage.
Locate the main circuit breakerand switch it off. Confirm that power is completely shut downusing a voltage tester.
Once the power is off, open the transfer switch panel carefully. Use a screwdriver to remove the cover and access the contacts inside.
Check for any dirt, corrosion, or wearon the contacts. Clean them gently with a soft brush or cloth if needed.
Visual Inspection
Start by turning off the power to avoid shocks. Check the transfer switch contactsfor any signs of wearor damage. Look for burn marks, pitting, or corrosionon the metal surfaces. Any rough spotsor broken partscan cause poor connection.
Cleaning the contacts helps maintain good electrical flow. Use a soft clothor fine sandpaperto gently remove dirt and rust. Avoid using harsh chemicals that can harm the metal. After cleaning, wipe with a dry cloth to remove any residue. This keeps the contacts working well and extends their life.

Credit: www.se.com
Testing The Contacts
Set the multimeter to the continuity mode. This mode checks if electricity flows through the contacts.
Place the multimeter probes on each contact point. The device beeps if the contacts connect properly.
If there is no beep, the contacts might be dirty or broken. Clean or replace them if needed.
- Turn off power before testing for safety.
- Hold probes steady on contact points.
- Listen for a beep sound from the multimeter.
- No beep means no continuity; check contacts carefully.
Common Issues And Fixes
Transfer switch contacts can wear out or get dirty, causing power issues. Checking for corrosion or loose connections helps identify problems early. Cleaning or tightening contacts often restores proper function quickly and safely.
Corrosion Problems
Corrosioncan cause transfer switch contacts to fail. It happens when moisture or dirt gets inside. Corroded contacts may look dark or rusty. This stops electricity from flowing well. Cleaning with a contact cleaneror fine sandpaper often helps. Always turn off power before cleaning. Regular checks prevent corrosion build-up over time.
Loose Connections
Loose contacts can cause sparksor poor connection. This leads to switch failure or electrical noise. Tighten screws or bolts holding the contacts. Check for broken wires or damaged parts. Use a screwdriver to secure connections firmly. Ensure no parts move or wiggle. Loose contacts reduce switch life and safety.
Maintenance Tips
Set a regular inspection scheduleto keep transfer switch contacts in good shape. Check contacts every few months to spot wear or damage early. Look for signs like burn marks, corrosion, or pitting. Clean contacts gently using a soft clothor contact cleaner. Avoid abrasive tools that can scratch surfaces.
Preventive measures help avoid switch failures. Always turn off power before inspecting or cleaning contacts. Tighten any loose connections to ensure reliable contact. Replace contacts if they show excessive wear or damage. Keep the switch area dry and free from dust or debris. Use a protective cover to shield contacts from moisture and dirt.
Frequently Asked Questions
How Do I Inspect Transfer Switch Contacts Safely?
Turn off all power sources before inspection. Use insulated tools and wear protective gloves. Ensure the area is well-lit and dry. Follow manufacturer instructions carefully to avoid electric shocks or damage.
What Signs Indicate Worn Transfer Switch Contacts?
Look for pitting, corrosion, or discoloration on contacts. Excessive heat marks or burning smells also indicate wear. These signs can cause poor conductivity and transfer switch failure.
How Often Should Transfer Switch Contacts Be Checked?
Check transfer switch contacts every 6 to 12 months. Regular inspection prevents unexpected failures and extends the switch’s lifespan. Frequency depends on usage and environmental conditions.
Can Dirty Contacts Cause Transfer Switch Failure?
Yes, dirty contacts increase resistance and heat. This can lead to poor electrical connection and switch malfunction. Cleaning contacts regularly ensures reliable operation.
Conclusion
Checking transfer switch contacts keeps your power system safe and reliable. Always turn off the power before starting. Look for dirt, corrosion, or wear on the contacts. Clean or replace parts if needed to avoid problems. Regular checks prevent unexpected failures and costly repairs.
Simple steps can save time and money. Stay safe by maintaining your transfer switch properly. Small actions make a big difference in power backup. Remember, good care helps your system work when you need it most.