Imagine having the power to monitor and optimize your generator’s performance with just a glance. Connecting multiple sensors to your generator can transform how you manage your power systems, providing real-time insights and enhancing efficiency.
This step-by-step guide will show you exactly how to do it, making your generator smarter and more reliable. You’ll learn the best practices and tips that will keep your generator running smoothly, ensuring peace of mind and saving you time and money.
Ready to unlock the full potential of your generator? Let’s dive in and discover how you can achieve seamless sensor integration today!
Choosing The Right Sensors
Generators work best with compatible sensors. Common types include temperature, voltage, and current sensors. These help monitor generator health and performance.
Sensors must match the generator’s outputand signal type. Some sensors use analogsignals, others use digital. Choose sensors that fit the generator’s control system.
Consider these factors for sensor selection:
- Accuracy:Higher accuracy means better monitoring.
- Durability:Sensors should withstand heat and vibration.
- Compatibility:Match sensor type with generator model.
- Power needs:Sensors should not overload the generator.
- Installation ease:Choose sensors easy to connect and maintain.

Credit: www.reddit.com
Preparing The Generator For Sensors
Check if the generator supports sensor connections. Not all generators have built-in sensor ports. Look for manuals or labels that show sensor compatibility. Knowing this saves time and prevents damage.
Find the exact sensor connection points on the generator. These are often marked as sensor inputor external sensor. Common places include the control panel or side panels. Look for ports like analog inputs, digital inputs, or special connectors.
- Use the user manual to identify sensor ports.
- Inspect the generator’s control panel carefully.
- Note the type of connection: USB, RJ45, or screw terminals.
- Make sure the sensor voltage matches the generator’s input.
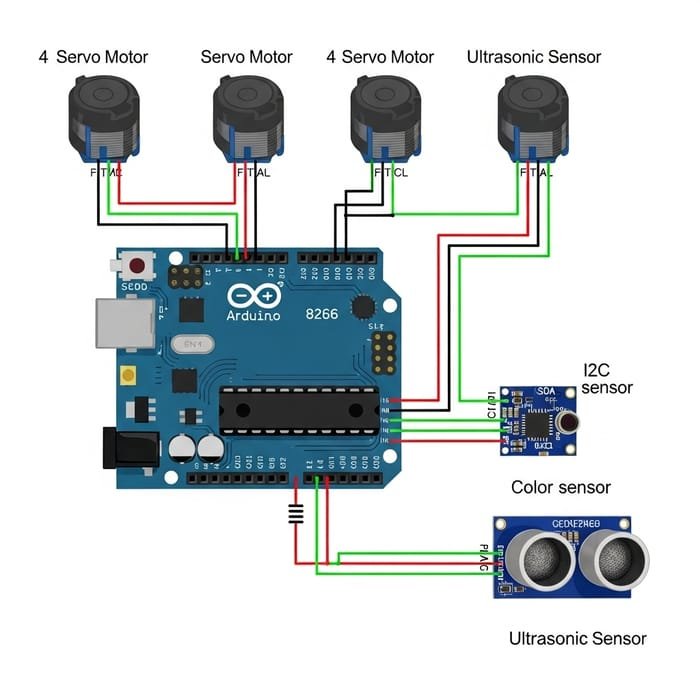
Wiring Multiple Sensors
Choosing between seriesand parallel wiringaffects sensor performance. Series wiring connects sensors end to end. This means the current flows through each sensor one after another. If one sensor breaks, the whole line stops working. Parallel wiring connects sensors side by side. Each sensor gets the same voltage. If one sensor fails, others still work. Parallel wiring is usually better for multiple sensors.
Using sensor hubsor multiplexershelps manage many sensors easily. These devices gather signals from many sensors into one output. They reduce wiring complexity and make installation simpler. Sensor hubs also help avoid signal interference. Multiplexers switch between sensors quickly, so one output can read many sensors. Both tools save space and keep your system organized.
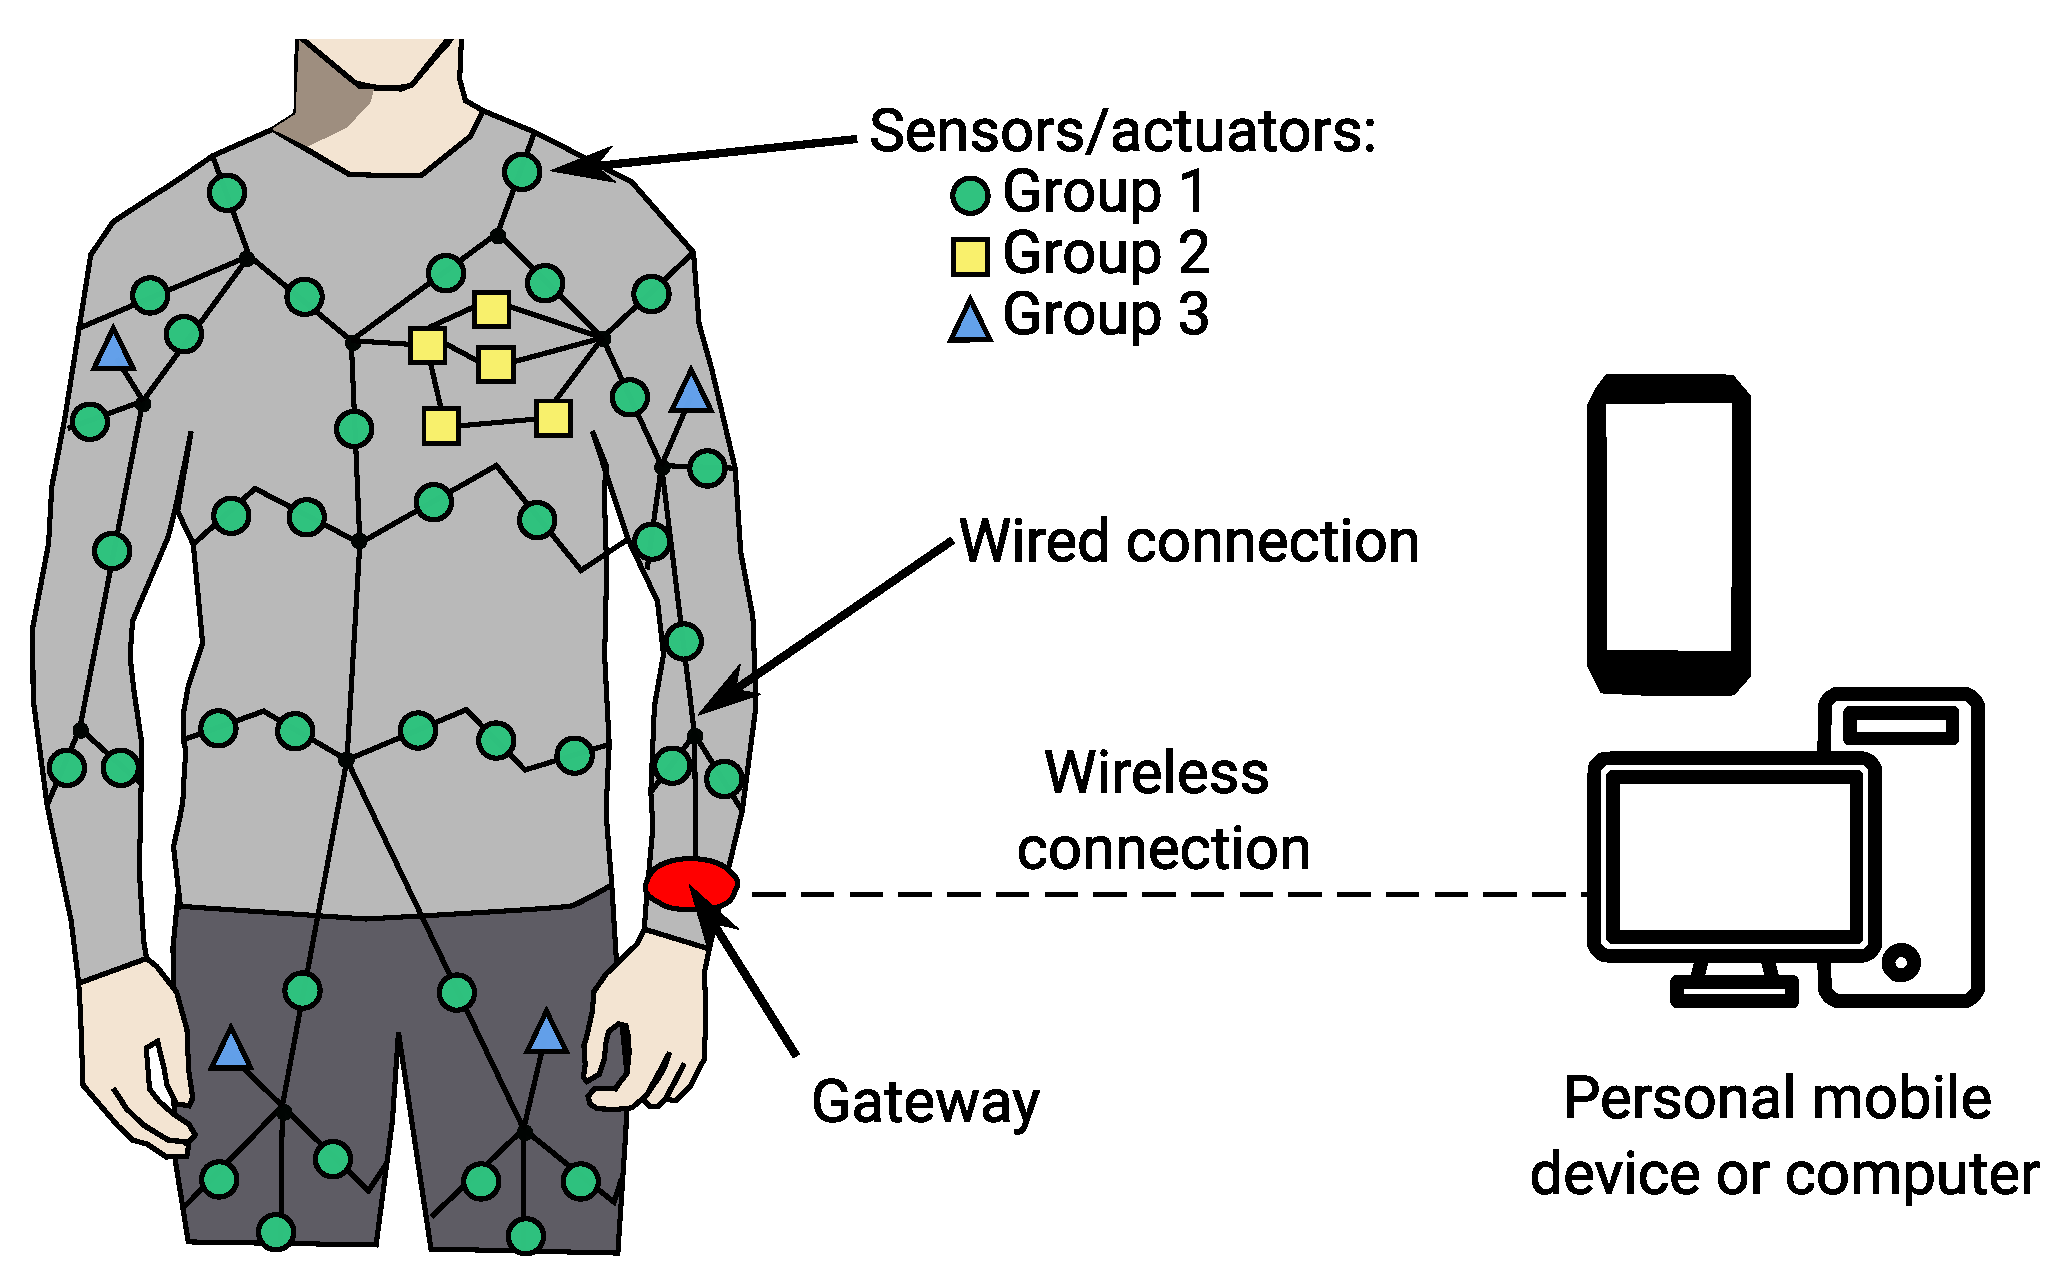
Credit: www.mdpi.com
Configuring Sensor Interfaces
Analog sensors send continuous signals to the generator. Connect sensor wires to the analog input ports carefully. Use shielded cables to reduce noise. Check sensor voltage levels match generator input range. Use resistors or amplifiers if needed to adjust signals. Proper grounding is essential to avoid errors. Calibrate sensors after connection for accurate readings.
Digital sensors send signals as on/off or pulses. Connect sensor outputs to digital input pins on the generator. Use pull-up or pull-down resistors to keep signals stable. Verify sensor voltage levels suit the digital inputs. For multiple sensors, use multiplexers or expanders to manage inputs efficiently. Test sensor response before full use to ensure reliability.
Integrating Sensors With Generator Control System
Connecting multiple sensors to a generator control system needs careful planning. Sensors must collect accurate data for better control. Use a data acquisition system to gather signals from each sensor. This system converts sensor signals into digital data for the control unit.
Ensure all sensors use compatible voltage and communication protocols. Organize sensor wiring to avoid interference. Label each wire clearly for easy troubleshooting. Connect sensors to the data acquisition input channels properly.
Calibrate sensor inputs to get precise readings. Calibration adjusts sensor output to match real values. Use known reference points or standards during calibration. Repeat calibration regularly to maintain accuracy. Document calibration settings for future reference.
| Sensor Type | Signal Type | Calibration Method |
|---|---|---|
| Temperature | Voltage (0-5V) | Use a known temperature source |
| Pressure | Current (4-20mA) | Apply standard pressure |
| Speed | Pulse | Compare with a tachometer |

Credit: www.oxfamwash.org
Testing And Troubleshooting
Check sensor signalswith a multimeter or signal tester. Ensure wires carry the expected voltage or current. Connect sensors one at a time to isolate problems. Watch for stable and clear signals. Fluctuating or missing signals indicate connection issues.
Common problems include loose wires, wrong connections, and power supply faults. Tighten all connectors and verify wiring matches the generator’s sensor input diagram. Replace damaged cables immediately. Confirm sensors receive proper power and ground.
| Issue | Cause | Fix |
|---|---|---|
| No sensor signal | Loose connection or broken wire | Secure or replace wiring |
| Weak or noisy signal | Interference or poor grounding | Check grounding, reroute wires |
| Incorrect reading | Wrong sensor type or wiring | Verify sensor specs and connections |
Maintaining Sensor Connections
Check sensor wires often to catch any damage early. Look for loose connections that might cause signal loss. Keep sensors clean from dust and dirt to ensure accurate readings.
Use shielded cables to reduce signal interference. Keep sensor wires away from power lines and motors. Twisting wires together can help lower noise.
| Regular Inspection Tips | Preventing Signal Interference |
|---|---|
| Look for broken or frayed wires. | Use shielded cables. |
| Ensure connectors are tight. | Keep cables away from power sources. |
| Clean sensors regularly. | Twist wires to reduce noise. |
Frequently Asked Questions
How Do I Connect Multiple Sensors To A Generator?
To connect multiple sensors, use a compatible sensor hub or multiplexer. Connect each sensor to the hub, then link the hub to the generator’s control system. This setup ensures proper signal management and accurate data collection from all sensors.
What Types Of Sensors Work With Generators?
Common sensors include temperature, vibration, pressure, and voltage sensors. These sensors monitor generator performance and health. Ensure your generator supports the sensor types you choose for seamless integration and accurate monitoring.
Can I Connect Wireless Sensors To A Generator?
Yes, wireless sensors can connect via Bluetooth or Wi-Fi modules. Ensure the generator’s system supports wireless communication. Wireless sensors offer flexible placement and reduce wiring complexity while providing real-time data transmission.
How Do I Troubleshoot Sensor Connection Issues?
Check sensor wiring and connections for damage or loose contacts. Verify sensor compatibility and power supply. Use diagnostic tools or software to identify faults and ensure proper sensor calibration and communication with the generator.
Conclusion
Connecting multiple sensors to a generator is easier than it seems. Plan the setup carefully and check all connections twice. Use the right cables and follow safety rules. Test each sensor before full operation to ensure proper working. This approach helps avoid errors and keeps the system reliable.
Simple steps lead to better monitoring and control. Keep instructions close and stay patient throughout the process. With careful work, your sensors and generator will work well together.