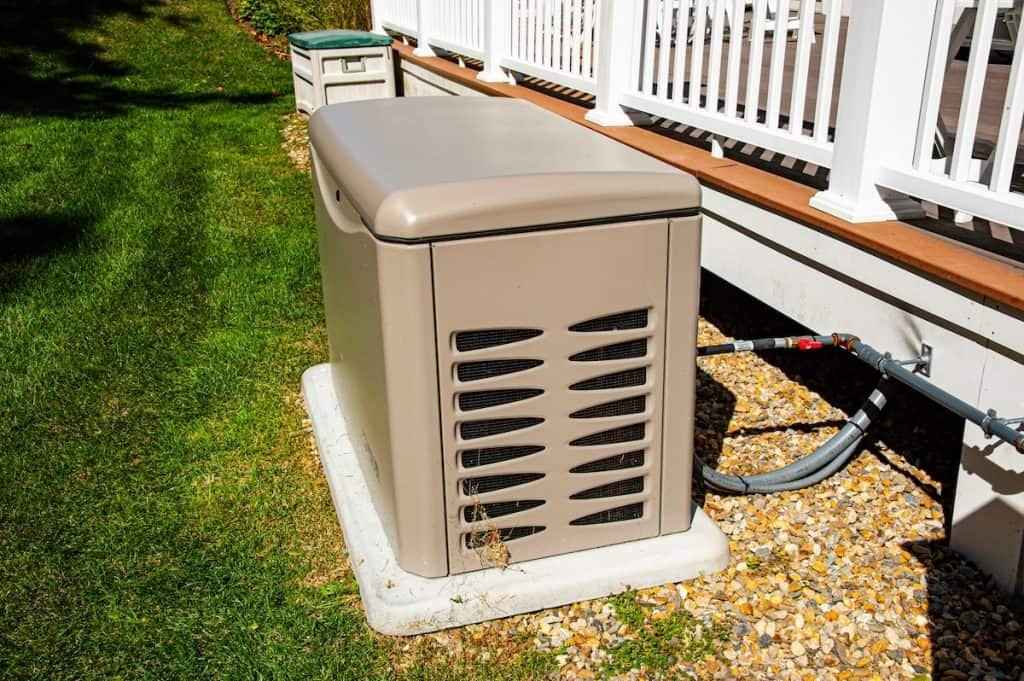
Imagine a storm hits, and the power goes out. You’re left in the dark, with your home’s essential appliances at a standstill.
Frustrating, right? Installing a standby home generator can be your ultimate solution, ensuring that your lights stay on and your appliances keep running no matter what. In this guide, you’ll discover how to install a standby home generator, turning that daunting task into a manageable project.
By the end, you’ll know exactly how to safeguard your home against power outages, keeping your family comfortable and safe. Stick with us, and you’ll soon enjoy the peace of mind that comes with always being prepared.
Choosing The Right Generator
Assessing power needsis key before choosing a standby generator. List the appliances and systems to keep running during an outage. Calculate their total wattage to find the right generator size. Remember, some devices need more power to start than to run.
Standby generators come in different types:
- Air-cooled: Smaller, less expensive, good for homes with moderate needs.
- Liquid-cooled: Larger, quieter, and better for bigger homes or businesses.
- Portable: Can be moved, but usually less powerful and not automatic.
Fuel options affect cost and convenience:
| Fuel Type | Advantages | Considerations |
|---|---|---|
| Natural Gas | Unlimited supply, cleaner burning | Needs gas line, may be costly to install |
| Propane | Portable, stores well | Requires tank refilling, fuel cost varies |
| Diesel | Powerful, good for large loads | Louder, needs fuel storage, emits more fumes |
Preparing The Installation Site
Choose a spot for the generator that is close to your home. It should be away from windows and doors to keep fumes outside. Clear space around the generator is needed for safe operation and easy service.
The generator needs at least 3 feet of clearanceon all sides. This space helps with cooling and keeps the unit safe from damage.
| Foundation Type | Description |
|---|---|
| Concrete Slab | Strong and stable base. Must be level and at least 4 inches thick. |
| Gravel Pad | Allows drainage and prevents moisture. Requires compacted gravel. |
| Wooden Platform | Less common. Should be treated wood and sturdy enough to hold weight. |
The foundation must support the generator’s weight and keep it steady. Level ground helps the generator run smoothly and safely.
Gathering Tools And Materials
Gather the essential toolsbefore starting the installation. Basic tools include:
- Screwdrivers (flathead and Phillips)
- Adjustable wrench
- Socket set
- Wire strippers
- Voltage tester
- Drill with drill bits
Use safety equipmentto protect yourself during work:
- Safety glasses
- Work gloves
- Ear protection
- Non-slip shoes
Prepare the electrical componentsneeded for connection:
| Component | Purpose |
|---|---|
| Automatic Transfer Switch (ATS) | Switches power from grid to generator |
| Circuit Breakers | Protects electrical circuits from overload |
| Electrical Wire | Connects generator to home wiring |
| Grounding Rod | Ensures safe grounding of the system |

Credit: aquariushomeservices.com
Installing The Generator Base
The concrete padmust be flat and strong. It supports the generator safely. Choose a spot that is dry and close to your home’s electrical panel. Use a wooden frame to hold the wet concrete in place. Pour the concrete evenly and smooth the surface. Let it dry for at least 24 hours before placing the generator.
Securing the generator is key. Use the mounting boltsprovided with your unit. Attach the generator firmly to the concrete pad. This prevents movement during strong winds or storms. Check that all bolts are tight but avoid over-tightening.
Leveling the generator ensures it runs well. Use a spirit levelto check the surface. Adjust the position until it is perfectly flat. The generator must also be aligned so the exhaust points away from the house. This avoids smoke entering your home.
Connecting The Fuel Supply
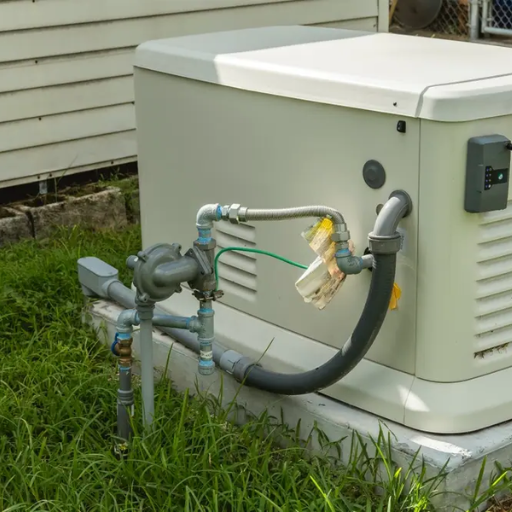
Installing fuel lines requires careful planning and safety. Use pipes made for fuel transport. Connect them tightly to avoid leaks. Always follow local rules for fuel line installation.
Check all fuel lines and connections for leaks. Use soapy water to spot bubbles. Never use open flames to check for leaks. Tighten any loose fittings immediately.
Fuel storage is important for safety and generator function. Store fuel in approved containers. Keep containers in a cool, dry place away from the home. Regularly inspect fuel for dirt or water. Replace old fuel to keep the generator running well.
Credit: shgeneratorset.com
Wiring The Generator
Installing the transfer switchis essential for safe generator use. It stops power from flowing back to the grid, protecting workers and your devices. Mount the switch near your main electrical panel for easy access.
Connecting to the home electrical panelrequires turning off the main power first. Use proper wires to link the transfer switch and generator. Check all connections are tight and secure to avoid sparks or shorts.
Grounding and safetykeep you and your home safe. Attach a grounding wire from the generator to a grounding rod driven into the earth. Always follow local codes and manufacturer instructions for grounding. Use safety gear while working on wiring.
Testing The System
Start the generatorto check if it runs smoothly without errors. Listen for unusual sounds and watch for warning lights.
Simulate a power outageby turning off the main power supply. This will test if the generator switches on automatically.
Ensure the generator powers the essential circuits. This confirms it can handle your home’s load.
Troubleshooting common issuesinvolves checking fuel levels, battery charge, and circuit breakers. Reset breakers if they trip.
Inspect the oil and coolant levels. Low levels can cause the generator to stop.
- Check the control panel for error codes.
- Make sure all connections are tight and secure.
- Consult the manual for specific error meanings.

Credit: www.youtube.com
Maintenance Tips
Regular inspection keeps the generator working well. Check for any damagesor loose parts. Clean dust and debris from the unit. Listen for strange sounds when running.
Fuel and oil must be checked often. Use fresh fuelto avoid clogs. Replace oil as the manual says. Low oil can harm the engine. Store fuel safely in a cool place.
Seasonal preparation helps the generator last longer. Test the generator before winter or summer. Clear snow or leaves around the unit. Adjust settings for temperature changes. Keep the area dry and ventilated.
Frequently Asked Questions
How Long Does It Take To Install A Standby Generator?
Installing a standby generator typically takes one to two days. This includes site preparation, electrical connections, and testing. Hiring a licensed professional ensures safe and efficient installation. Time may vary based on generator size and home complexity.
What Permits Are Needed For Generator Installation?
You usually need electrical and building permits before installing a standby generator. Check local regulations and codes for specific requirements. Permits ensure the installation meets safety standards and legal compliance. Always consult your local authority or a professional installer.
Can I Install A Standby Generator Myself?
DIY installation is not recommended for standby generators. It involves complex electrical and fuel connections requiring professional expertise. Improper installation can lead to safety hazards and void warranties. Hiring a licensed electrician is the safest and most reliable option.
How Much Does A Standby Generator Installation Cost?
Installation costs vary between $3,000 to $10,000, depending on generator size and complexity. Additional expenses include permits, fuel lines, and transfer switches. Getting multiple quotes helps find competitive pricing. Professional installation guarantees safety and code compliance.
Conclusion
Installing a standby home generator keeps your power on during outages. Follow each step carefully for safety and success. Check local rules before starting your project. Use the right tools and materials for best results. Testing the generator after installation ensures it works properly.
Regular maintenance will keep it ready when needed. A standby generator offers peace of mind and comfort. Stay prepared and protect your home from power loss. Simple steps lead to reliable backup power every time.