Imagine this: a fierce storm rolls in, and suddenly, your entire neighborhood plunges into darkness. You’re left without power, worrying about your family’s comfort and the food in your fridge spoiling.
But what if you could ensure your home never goes dark again? Installing a standby home generator could be your ultimate solution. It’s not as daunting as it sounds, and by the end of this guide, you’ll feel confident in bringing light back to your home during those unexpected outages.
Dive in to discover how you can secure a reliable power source and keep your household running smoothly, no matter what Mother Nature throws your way.

Credit: www.youtube.com
Choosing The Right Generator
Assessing power needsis the first step in choosing a standby generator. Check the total wattage of all devices you want to power during an outage. Include essentials like refrigerators, lights, and heating systems. A generator with a bit more capacity than needed gives room for extra devices.
| Type of Standby Generator | Description | Best For |
|---|---|---|
| Air-cooled | Simple design, less expensive, quieter | Small to medium homes |
| Liquid-cooled | More powerful and durable, needs regular maintenance | Large homes or businesses |
- Natural gasruns cleaner and connects to home lines.
- Propanestores easily and lasts longer.
- Dieseloffers strong power but needs fuel storage.
Preparing The Installation Site
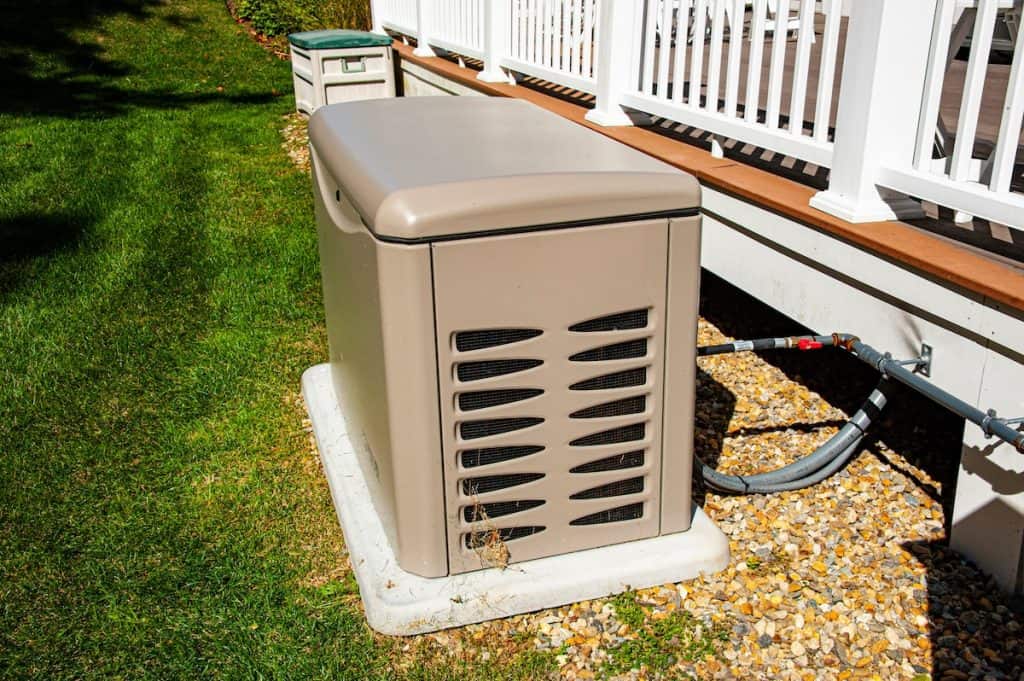
Choose a flat, stable surfacefor the generator site. Avoid low areas that collect water. Keep the unit away from windows, doors, and vents to prevent fumes from entering your home. A distance of at least 5 feetfrom the house is ideal.
Good ventilationis crucial. The generator releases exhaust gases that must escape freely. Make sure the area is open enough to allow air flow. Avoid enclosing the generator in tight spaces.
| Local Codes | Requirement |
|---|---|
| Permits | Check if you need a permit before installation. |
| Distance Rules | Follow rules about how far the generator must be from structures. |
| Fuel Storage | Store fuel safely according to local laws. |
Gathering Tools And Materials
Gathering the right tools and materialsensures a smooth installation. Essential tools include:
- Wrenches and screwdrivers
- Drill with bits
- Voltage tester
- Pipe wrenches
- Measuring tape
Required materials are:
- Generator unit
- Transfer switch
- Fuel supply line
- Conduit and wiring
- Concrete pad or stand
Safety equipment must not be overlooked:
- Protective gloves
- Safety glasses
- Hard hat
- Hearing protection
- Fire extinguisher nearby
Installing The Generator Base
Start by choosing a flat area for the concrete pad. It must be strong and stable to hold the generator’s weight. The pad should be at least 4 inches thick and extend beyond the generator’s base by a few inches on all sides.
Clear the ground of grass, rocks, and debris. Then, dig a shallow area for the pad. Use wooden forms to hold the concrete in place while it dries. Pour the concrete and smooth its surface with a trowel. Let it cure for several days until it hardens completely.
Check the surface with a level tool. The concrete pad must be perfectly flat and even. This prevents vibrations and ensures the generator runs smoothly.
Secure the generator to the pad using anchor bolts. These bolts keep the unit stable during strong winds or shaking. Tighten the bolts firmly but do not overtighten to avoid damage.
Connecting Electrical Components
Installing a transfer switchis important for safe generator use. It stops power from the generator and utility from mixing. The switch connects to your home’s electrical panel. A licensed electrician should handle this part for safety.
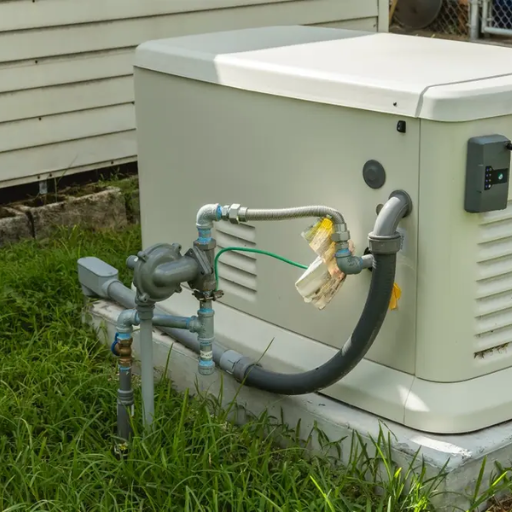
Wiring the generatormeans linking it to the transfer switch. Use wires made for outdoor use and the right size. Connect the wires to the generator’s power outlet and the transfer switch input. Double-check all connections are tight and secure.
Grounding the systemprotects against electrical shock. Attach a grounding wire from the generator to a ground rod in the earth. Make sure the ground rod is deep enough, usually 8 feet. Proper grounding keeps you and your home safe during operation.
Credit: shgeneratorset.com
Hooking Up The Fuel Supply
Connecting gas lines requires careful attention to safety and detail. Use proper fittingsto join pipes and avoid leaks. Always apply thread sealantor tape made for gas lines on threaded connections.
Check each joint for tightness but do not over-tighten, as it can damage fittings. Perform a pressure testto confirm no gas escapes before activating the generator.
- Place the fuel tank on a stable, flat surface
- Keep the tank away from heat sources and direct sunlight
- Ensure easy access for refilling and maintenance
- Maintain proper clearance around the tank for ventilation
Proper fuel tank placementensures safe and efficient generator operation.
Testing The Generator
Initial power-uprequires checking all connections first. Turn on the generator and listen for unusual sounds. Watch for warning lights or error codes. Let it run for a few minutes to stabilize.
Simulating a power outage helps test the generator’s automatic start. Switch off the main power supply. The generator should start within seconds. Check if it supplies power to essential circuits.
Troubleshooting common issuesinvolves:
- Checking fuel levels and refilling if low.
- Ensuring the battery is charged and terminals are clean.
- Inspecting air filters and replacing if dirty.
- Resetting circuit breakers if tripped.
- Consulting the manual for error codes or flashing lights.
Maintaining Your Generator
Regular inspectionhelps catch problems early. Check for leaks, dirt, and loose parts. Look at the fuel system and wiring. Clean the generator to keep it running well. Test the unit often to ensure it starts and runs smoothly.
Oil and filter changeskeep the engine healthy. Change oil after every 50-100 hours of use or at least once a year. Replace the oil filter at the same time. Using clean oil and filters extends the generator’s life and keeps it working efficiently.
Battery careis vital for standby generators. Check battery terminals for corrosion and clean them if needed. Keep the battery charged and replace it every 3-5 years. A strong battery ensures the generator starts quickly when power goes out.

Credit: aquariushomeservices.com
Frequently Asked Questions
What Tools Are Needed To Install A Standby Generator?
You need basic tools like a drill, wrench, screwdriver, and voltage tester. Also, gather safety gear, conduit, and wiring materials. Proper tools ensure a smooth and safe installation process.
How Long Does It Take To Install A Standby Generator?
Installation usually takes one to two days. Complex setups or larger units may require more time. Professional installation ensures safety and compliance with local codes.
Can I Install A Standby Generator Myself?
DIY installation is possible if you have electrical experience. However, it’s safer to hire a licensed electrician. Proper installation prevents hazards and ensures your generator works efficiently.
Where Should A Standby Generator Be Placed?
Place the generator outdoors on a flat, stable surface. Keep it away from windows, doors, and vents to avoid carbon monoxide risks. Follow local codes for safe placement.
Conclusion
Installing a standby home generator brings peace during power outages. Follow each step carefully for safe, smooth setup. Regular maintenance keeps your generator ready when needed. Choose the right location and connect parts properly. Testing the system helps ensure it works well.
Stay prepared and protect your home from blackouts. A standby generator is a smart, reliable backup power choice.