Are you tired of unexpected power outages leaving you in the dark? Your generator is your trusty backup, but to keep it running smoothly, you need to pay attention to its belts.
These essential components ensure your generator operates efficiently, but they can wear out over time. Neglecting them could lead to costly repairs or even a complete breakdown when you need power the most. In this guide, we’ll walk you through simple, practical steps to maintain your generator belts, ensuring you have peace of mind during every storm or power cut.
Ready to keep your generator in top shape? Let’s dive in and discover how a little maintenance can save you from a lot of headaches.
Choosing The Right Generator Belt
Choosing the right generator belthelps your generator work well and last longer. There are different types of belts like V-belts, serpentine belts, and timing belts. Each type fits a specific generator model and use.
Materials matter too. Most belts are made from rubberwith fibersinside for strength. Some belts have neoprenefor heat and oil resistance. Pick a material that suits your generator’s environment and use.
Matching belt size and specs is key. The belt must fit the pulleys perfectly. Check the length, width, and thickness. Also, follow the generator’s manual for the exact belt type and size. Wrong size belts can slip or break easily.

Credit: tikweld.com
Regular Inspection Techniques
Regularly checking generator belts helps avoid sudden breakdowns. Examine belts closely for wear and tear. Look out for cracks, fraying, or shiny spots on the belt surface. These signs point to belt damage and possible failure.
Identifying cracks and frayingis simple by running your fingers along the belt edges. Feel for rough or uneven areas. Small cracks or loose threads weaken the belt.
Assessing belt tensionis crucial. A belt that is too loose may slip, causing poor generator performance. A belt too tight can wear out faster or damage parts. Use a belt tension gauge or press down on the belt; it should flex slightly but not too much.
- Check for cracks and splits on the belt surface.
- Feel for frayed edges or loose threads.
- Press the belt to test for proper tension.
- Listen for squealing sounds indicating slippage.
Proper Belt Installation
Tools Requiredinclude a wrench, screwdriver, belt tension gauge, and safety gloves. These help ensure a safe and tight installation.
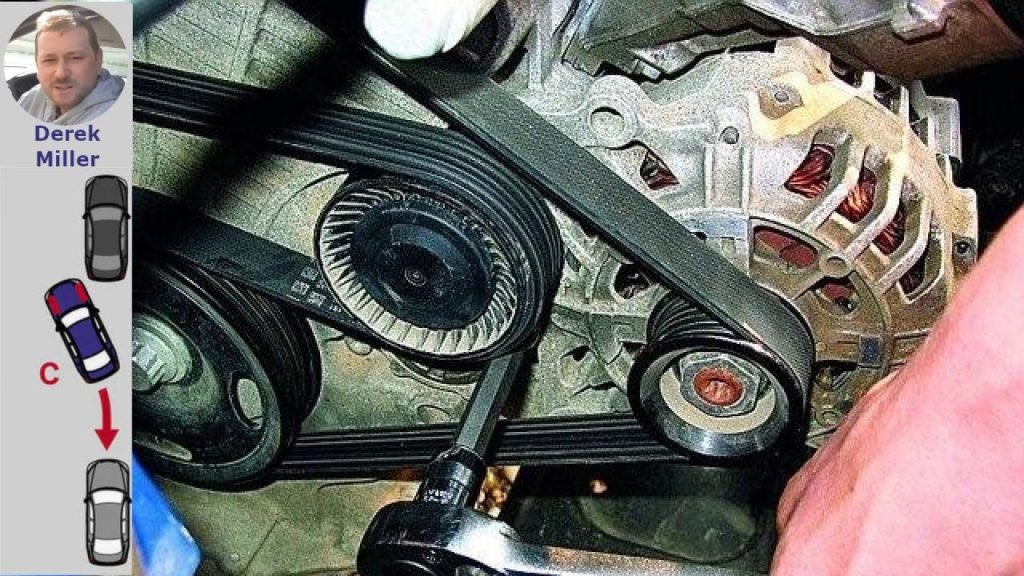
Step-by-Step Installationstarts by turning off the generator and unplugging it. Loosen the bolts holding the belt tensioner. Remove the old belt carefully. Place the new belt on the pulleys following the correct path. Tighten the tensioner bolts while checking belt tension with the gauge. The belt should be firm but not too tight. Run the generator briefly to check belt movement and noise. Adjust tension if needed.
Common Installation Mistakesinclude installing the belt too loose or too tight. Wrong belt alignment causes wear and noise. Forgetting to check tension can lead to belt slipping or breakage. Using wrong tools can damage bolts or parts.
Credit: pleavinpower.co.uk
Routine Maintenance Practices
Cleaning the belt and pulleys removes dust and dirt. Use a soft brush or cloth for this task. Avoid water or harsh chemicals, as they can damage the belt. Keep pulleys free from grease to stop slipping. Check for cracks or frays during cleaning.
Lubrication helps keep parts moving smoothly. Only lubricate the pulleys and bearings, not the belt itself. Use a light machine oil for best results. Too much oil can attract dirt and cause wear.
Belt tension affects generator performance and belt life. Adjust the tension if the belt feels loose or slips. Use a belt tension gauge or press the belt midway between pulleys. The belt should move about half an inch with moderate pressure.
Troubleshooting Belt Issues
Squealing or slipping beltsoften mean the belt is loose or worn out. Check the belt tension and adjust it if needed. Replace the belt if it shows cracks or fraying. Dirt and oil can cause slipping, so clean the belt and pulleys regularly.
Overheating problemsmay happen if the belt is too tight or the generator is overloaded. Ensure the belt has the right tension. Avoid running the generator beyond its capacity. Keep the cooling system clean and clear of debris.
Unusual noises and vibrationscan signal misalignment or worn parts. Inspect pulleys for damage and align them properly. Tighten loose bolts and replace any broken components. Regular checks prevent bigger problems later.

Credit: www.amazon.ca
When To Replace Generator Belts
Signs of irreparable damageinclude cracks, fraying, and deep wear. A belt that slips or squeals often needs replacement. If the belt looks shiny or glazed, it has lost grip. Belts that stretch or become loose reduce generator efficiency. Look for missing chunks or uneven surfaces, which mean the belt cannot be saved.
Recommended replacement intervalsvary by generator type and usage. Most belts last about 3 to 5 yearsor 30,000 to 60,000 milesin vehicles. Check your owner’s manual for exact guidance. Frequent inspections every few months help catch wear early. Replace belts sooner if the generator works in harsh conditions like heat or dust.
Disposing of old belts safelyis important to protect the environment. Never throw belts in regular trash. Take used belts to recycling centers or auto shops that handle rubber waste. Some belts contain materials that harm nature if burned or buried. Proper disposal helps keep communities clean and safe.
Frequently Asked Questions
How Often Should I Check Generator Belts?
Check generator belts every 3 months or 1,000 hours of use. Regular inspections prevent unexpected breakdowns and improve performance. Look for cracks, fraying, or wear during each check to ensure safety and efficiency.
What Signs Indicate A Worn Generator Belt?
Signs include squealing noises, slipping, cracks, or visible wear. A worn belt reduces generator efficiency and can cause failure. Timely replacement maintains smooth operation and prevents costly repairs.
How Do I Properly Tighten A Generator Belt?
Use a belt tension gauge or follow manufacturer guidelines. Tighten until there’s about half an inch of play. Avoid over-tightening, which can damage bearings and reduce belt life.
Can I Use Any Belt Replacement For My Generator?
No, always use belts specified by the manufacturer. Using the wrong belt can cause poor fit, slippage, or damage. Refer to your generator’s manual for the correct belt type and size.
Conclusion
Maintaining generator belts keeps your machine running smoothly. Check belts often for cracks or wear. Tighten belts to prevent slipping or damage. Clean belts from dust and oil regularly. Replace belts if they show signs of heavy wear. Simple care saves costly repairs and downtime.
A well-kept belt improves generator performance. Small steps make a big difference in reliability. Keep your generator ready for any power need. Regular belt care protects your investment over time.