Imagine losing power during a storm or outage—and knowing your home will stay safe and comfortable no matter what. Wiring a home standby generator might sound complicated, but with the right steps, you can take control and protect your family.
In this guide, you’ll discover simple, clear instructions to help you wire your generator the right way. Keep reading, and by the end, you’ll feel confident handling this crucial task yourself.
Choosing The Right Generator
Home standby generators come in different types. The main types are portableand automatic. Portable models need manual setup during power cuts. Automatic generators turn on by themselves when power fails. Choosing depends on your needsand budget.
Power capacity is key. Smaller homes may need 5kW to 10kW. Larger homes or those with many appliances might need 20kW or more. Check the power use of your devices to pick the right size.
| Fuel Type | Pros | Cons |
|---|---|---|
| Natural Gas | Clean burning, unlimited supply if connected | Needs gas line, may be costly to install |
| Propane | Portable, stores well | Requires tank refills, less available than gas |
| Diesel | Powerful and efficient | Loud, emits more pollution |
Credit: www.diychatroom.com
Gathering Required Tools And Materials
Essential wiring toolsinclude wire strippers, screwdrivers, and pliers. A multimeter helps check electrical flow safely. Use a drill for mounting and a conduit bender for shaping conduit pipes. These tools make wiring easier and safer.
Safety equipmentis very important. Wear insulated gloves and safety glasses. Use ear protection if working near loud generators. A hard hat protects your head in tight spaces. Always have a fire extinguisher nearby.
| Electrical Components | Description |
|---|---|
| Transfer Switch | Directs power from generator to home circuits safely. |
| Generator Power Cord | Connects generator to the transfer switch or outlet. |
| Circuit Breakers | Protect wiring by stopping overloads and short circuits. |
| Conduits and Connectors | Protect wires and keep them organized. |
Preparing The Installation Site
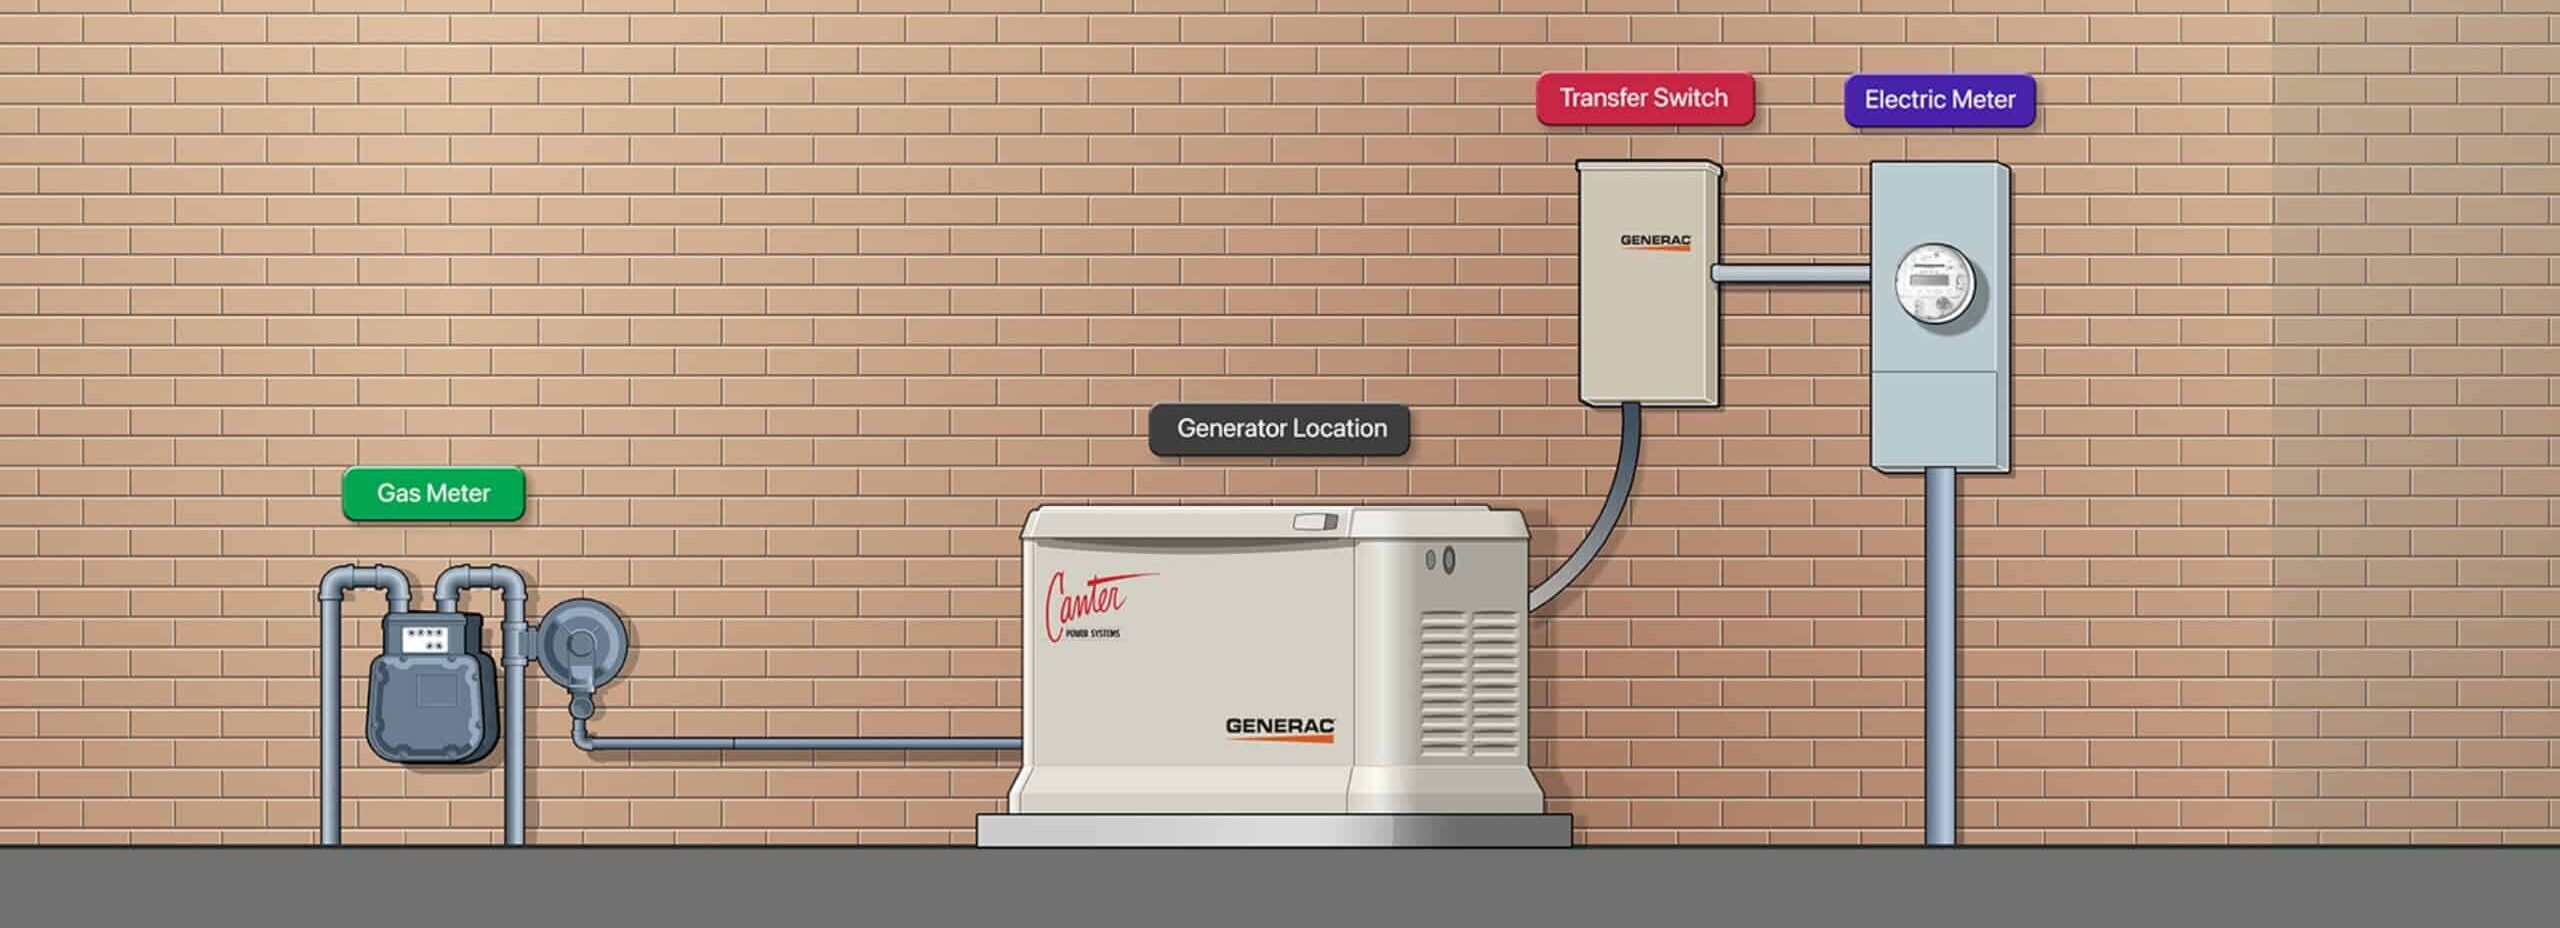
Choose a location for the generator that is close to your home’s main electrical panel. This helps reduce wiring costs and energy loss. The spot should be flat and stable to keep the generator steady. Avoid placing it near windows or doors to stop exhaust fumes from entering the house.
Proper ventilation is very important. The generator needs fresh air to run safely. Make sure the area has good airflow and is not enclosed. This prevents dangerous gases from building up.
| Local Codes | Details |
|---|---|
| Permits | Check if you need permission from local authorities before installation. |
| Clearances | Follow rules about how far the generator must be from buildings and property lines. |
| Noise Limits | Some areas have limits on how loud a generator can be. |
Credit: canterpowersystems.com
Installing The Transfer Switch
Transfer switchesconnect your generator to your home’s electrical system safely. There are two main types: manualand automatic. A manual switchneeds you to flip a lever to start the generator. An automatic switchdoes this on its own when power goes out.
Mounting the transfer switch must be done near the main electrical panel. Use screws and anchors to secure it to a wall. Make sure it is mounted in a dry place and easy to reach. Keep space around it for safety and future maintenance.
| Step | Description |
|---|---|
| Turn off Main Power | Switch off the main breaker to stop electricity flow. |
| Connect Transfer Switch | Attach transfer switch wires to the main panel breakers. |
| Connect Generator | Run wires from the transfer switch to the generator. |
| Test System | Turn on the generator and check power flow. |
Wiring The Generator To The Transfer Switch
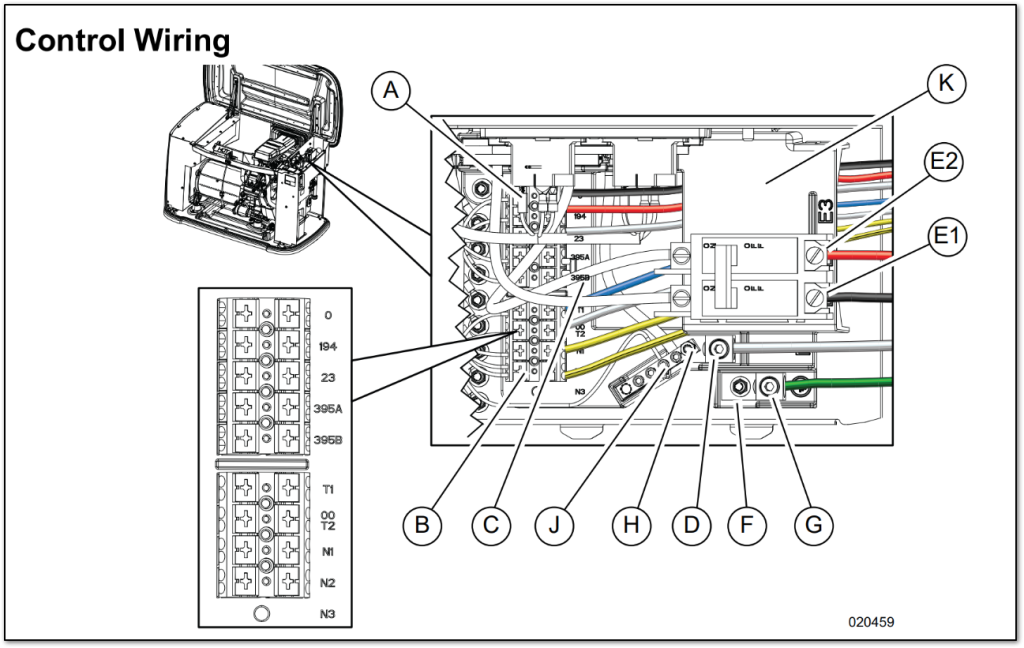
Run the power cable from the generator to the transfer switch carefully. Use cables rated for the generator’s power output. Keep cables neat and avoid sharp bends or damage. Secure the cable with clamps to prevent movement or wear.
Make secure connections by tightening all terminal screws firmly. Loose connections can cause sparks or power loss. Use a screwdriver to ensure wires are snug in their terminals. Double-check each connection for safety.
Grounding the system is very important for safety. Connect the generator’s grounding wire to a grounding rod driven into the earth. This prevents electric shocks and protects equipment. Verify the grounding path is continuous and solid.
Testing The System
Turn onthe generator system to check power flow. Wait a few minutes for the generator to stabilize. Watch for any warning lightsor error messages on the control panel. Make sure the system switches from utility power to generator power smoothly.
To simulate a power outage, flip the main breaker off. This forces the generator to start automatically. Check if all connected appliances receive power. This test confirms the transfer switch works correctly.
| Common Issue | Possible Cause | Quick Fix |
|---|---|---|
| Generator won’t start | Low fuel or battery | Refuel or charge battery |
| Transfer switch failure | Wiring loose or damaged | Check and tighten wires |
| No power to appliances | Breaker tripped | Reset breaker |
Maintaining Your Standby Generator
Regular inspection keeps your generator in good shape. Look for dirt, rust, and loose parts. Check the control panel lights and test the auto-start feature. Clean air filters and vents to avoid overheating. Small problems can turn big without care.
- Battery checks:Make sure the battery is clean and tight. Test voltage and charge levels often. Replace old batteries to prevent startup failure.
- Fuel checks:Use fresh fuel only. Check the fuel tank for leaks or corrosion. Drain old fuel to avoid clogging the engine.
Professional servicing is key for safety and performance. Experts can spot hidden issues. Schedule service every 6 to 12 months. Keep records of all maintenance work.

Credit: www.youtube.com
Frequently Asked Questions
How Do I Wire A Home Standby Generator Safely?
To wire a home standby generator safely, always turn off the main power. Use a transfer switch to connect the generator. Follow local electrical codes and consult a licensed electrician. Proper grounding and correct wire sizing are essential to prevent hazards.
What Tools Are Needed For Wiring A Standby Generator?
You need a voltage tester, wire strippers, screwdrivers, conduit bender, and a drill. Also, use appropriate wires, conduit, and a transfer switch. Having these tools ensures a smooth and safe installation process.
Can I Wire A Standby Generator Myself?
Yes, if you have electrical knowledge and follow safety codes. However, hiring a licensed electrician is recommended to ensure proper installation and compliance with local regulations.
What Size Wire Is Required For A Standby Generator?
Wire size depends on your generator’s amperage and distance from the panel. Typically, 6 to 10-gauge wire is used. Always consult the generator manual and local codes to choose the correct size.
Conclusion
Wiring a home standby generator ensures your home’s safety and reliability. Follow the steps carefully for a secure connection. Ensure all safety precautions are met. Double-check connections to avoid errors. Consult a professional electrician if unsure. This helps prevent potential hazards.
Regular maintenance keeps your generator working efficiently. Stay prepared for any power outage. Enjoy peace of mind with a reliable power source. A well-wired generator offers comfort and convenience. Keep these tips in mind for successful installation. Your home will thank you for the effort.
Reliable power awaits with your standby generator.