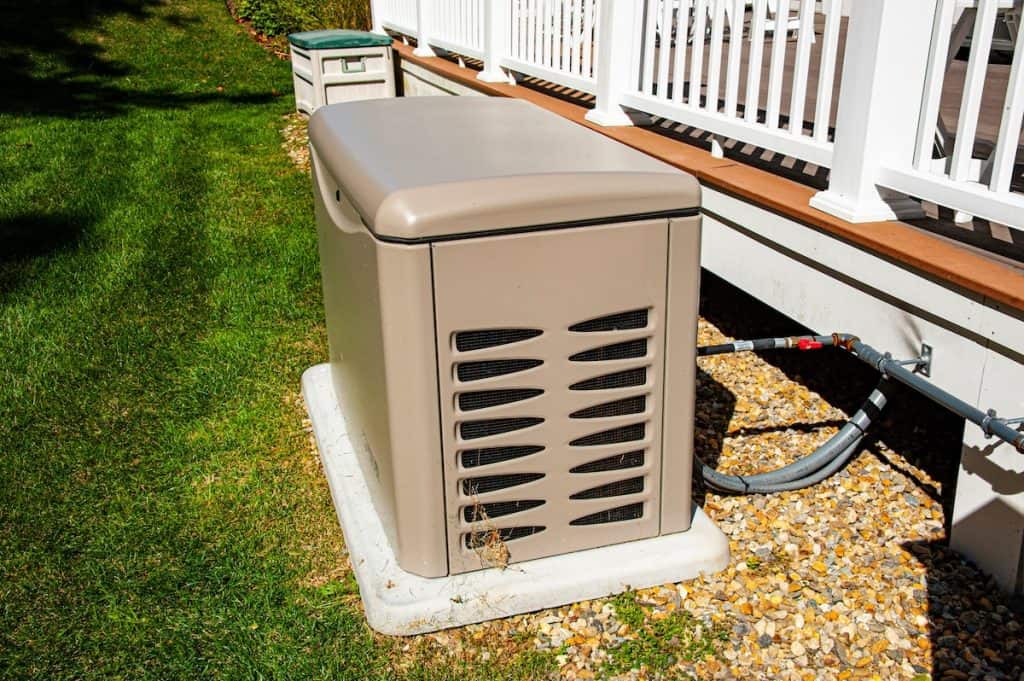
Imagine a storm hits, and suddenly, your home plunges into darkness. No lights, no heating, and your fridge slowly warming up.
It’s a nightmare scenario, right? But what if you could flick a switch and bring everything back to life instantly? That’s the magic of a standby generator. Installing one at home not only shields you from unexpected power outages but also provides peace of mind knowing your home is prepared for anything.
Curious about how you can install a standby generator yourself? It’s simpler than you might think. In this guide, you’ll learn the step-by-step process, ensuring your home stays powered no matter what. Ready to take control and never be left in the dark again? Let’s dive in!
Credit: shgeneratorset.com
Choosing The Right Generator
Standby generators come in different types. The most common are natural gasand propane-powered. Some use diesel. Each type fits different needsand budgets. A natural gasgenerator connects to your home’s gas line. Propane models use tanks that you refill. Diesel generators are powerful but need more care.
Sizing your generator is key. The size depends on how much poweryou need. Think about the appliancesand devicesyou want to run during an outage. A generator too small won’t power everything. Too big, it wastes fuel and costs more.
| Fuel Type | Pros | Cons |
|---|---|---|
| Natural Gas | Continuous fuel supply, low emissions | Requires gas line, may not work in outages affecting gas |
| Propane | Portable, stores for long time | Needs refilling, tanks take space |
| Diesel | Strong power, good for heavy use | Loud, needs more maintenance |
Credit: shgeneratorset.com
Preparing Your Installation Site
Selecting a locationfor your standby generator is crucial. It should be close to your home’s electrical panel but far from windows and doors to avoid fumes entering your home. The area must be flat and clear of debris to keep the generator stable and safe.
Meeting local codesmeans checking with your city or county for rules about generator placement. These codes ensure safety and proper noise levels. Always get permits if needed before starting installation.
Site preparation tipsinclude leveling the ground and adding a concrete or gravel base. This helps prevent water damage and keeps the generator steady. Leave enough space around the generator for maintenance and airflow.
Gathering Necessary Tools And Materials
Gathering the right tools and materialsis key. Essential tools include a wrench set, screwdrivers, and a drill. A voltage testerhelps check electrical connections safely. A pipe wrenchis needed for gas line work.
Required materials often include the standby generator, transfer switch, and conduit pipes. Use copper wiringrated for outdoor use. A concrete padprovides a stable base for the generator.
Safety gear is important. Wear glovesto protect hands. Use safety gogglesto shield eyes. A hard hatmay be needed if working near structures. Ear protection helps during loud operation. Always have a fire extinguishernearby.
Installing The Generator Base
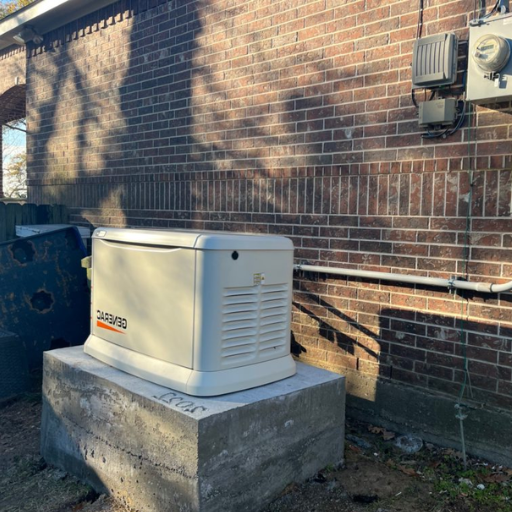
A concrete padprovides a solid base for the generator. It must be strong and flat. Use a wooden frame to shape the pad. Pour concrete evenly inside the frame. Let it dry fully before placing the generator.
Check the pad’s levelusing a spirit level tool. A level surface keeps the generator stable and safe. Adjust the frame or add concrete if needed. Avoid slopes or bumps on the pad.
Good ventilationis important to avoid heat buildup. Leave space around the generator for air to flow. Do not block vents or exhaust areas. This helps the generator run cool and efficiently.
Connecting The Fuel Supply
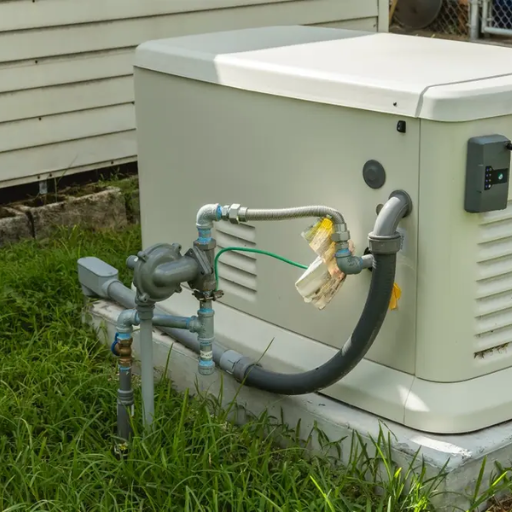
Natural gas lines must be connected to the generator carefully. A licensed plumber should install the lines. The lines carry fuel safelyfrom your home supply to the generator. Pipes should be checked for leaks before use. Always use approved materialsfor gas connections.
Propane tanks provide another fuel option. Tanks should be placed on a stable surface outside. Keep tanks away from windows and doors. Use pipes or hoses rated for propane. Regularly inspect tanks and lines for damage.
- Always shut off fuel supply before any work.
- Check all connections with soapy water for leaks.
- Use proper tools and equipment for installation.
- Keep the fuel area clear of debris and ignition sources.
- Follow local codes and regulations strictly.

Credit: www.youtube.com
Wiring The Transfer Switch
Find the main electrical panelinside your home. It is usually near the electric meter or in a basement or garage. The panel contains circuit breakers or fuses that control power in your house. Ensure the area is clear and well-lit for safe work.
Mount the transfer switch close to the main electrical panel. Use screws to fix it firmly on the wall. Make sure it is easy to reach and has enough space for wiring. Keep it away from water or damp spots to avoid damage.
Turn off the main power before making any electrical connections. Connect the wires from the transfer switch to the circuits you want to back up. Use a screwdriver to tighten all screws securely. Double-check each connection for safety and proper contact.
Grounding The Generator System
Groundingis a key part of installing a standby generator. It helps protect against electrical shocks and keeps the system safe. The generator must connect to a proper ground rodto divert electricity safely into the earth.
Ground rodsare usually copper or galvanized steel rods driven into the ground near the generator. The rod should be at least 8 feet long to reach deep, moist soil for better conductivity.
- Drive the rod straight into the earth, close to the generator.
- Use a copper wire to connect the generator’s grounding terminal to the rod.
- Ensure all connections are tight and secure.
Testing the ground connection is important. Use a ground resistance tester to check if the resistance is below 25 ohms. Lower resistance means better grounding and safer operation.
Testing And Starting The Generator
Start with a careful initial inspectionof the generator. Check for any visible damage or loose parts. Ensure all connections are secure and fuel levels are adequate. Confirm the battery is fully charged.
During running test cycles, let the generator run for about 15 minutes. Observe for unusual noises, vibrations, or smoke. Test the transfer switch to confirm it switches power smoothly. Monitor the fuel consumption and engine temperature.
Troubleshoot common issues by following this guide:
| Issue | Possible Cause | Solution |
|---|---|---|
| Generator won’t start | Low battery or empty fuel tank | Charge battery or refill fuel |
| Unusual noise | Loose parts or worn engine | Tighten parts or call a technician |
| Smoke from exhaust | Dirty air filter or oil leak | Clean filter or check oil levels |
Maintenance Tips For Longevity
Regular inspections keep your generatorrunning smoothly. Check for leaks, loose wires, and dirt build-up. Look for cracks or damage on the unit’s body.
Change the filters and oiloften. This helps the engine stay clean and work well. Follow the schedule in the manual for best results. Clean filters improve air flow and fuel use.
Battery care is very important. Keep the battery terminals clean and tight. Test the battery voltage regularly. Replace the battery every few years to avoid failure during power outages.
- Inspect the generator every month
- Replace oil and filters as per manual
- Clean battery terminals and check voltage
- Store generator in a dry, safe place
Frequently Asked Questions
What Size Standby Generator Do I Need For My Home?
Choosing the right size depends on your home’s power needs. Calculate total wattage of essential appliances. A 7kW to 22kW generator typically suits most homes. Consulting a professional helps ensure optimal sizing and efficiency.
How Long Does It Take To Install A Standby Generator?
Installation usually takes 1 to 3 days. This includes site preparation, wiring, and testing. Complex setups or permits may extend the timeline. Professional installation ensures safety and compliance with local codes.
Can I Install A Standby Generator Myself?
DIY installation is not recommended. Standby generators involve complex electrical and fuel connections. Hiring a licensed electrician ensures safety and code compliance. Improper installation risks damage, injury, and voided warranties.
What Maintenance Does A Standby Generator Require?
Regular maintenance includes oil changes, filter replacements, and battery checks. Run the generator monthly for 10-15 minutes to keep it functional. Annual professional servicing ensures longevity and reliable performance during outages.
Conclusion
Installing a standby generator keeps your home powered during outages. Choose the right location and follow safety rules. Connect the generator properly to your home’s electrical system. Regular maintenance ensures the generator works when needed. A standby generator offers peace of mind and comfort.
Take your time and do the job carefully. You will enjoy reliable power every time the lights go out.