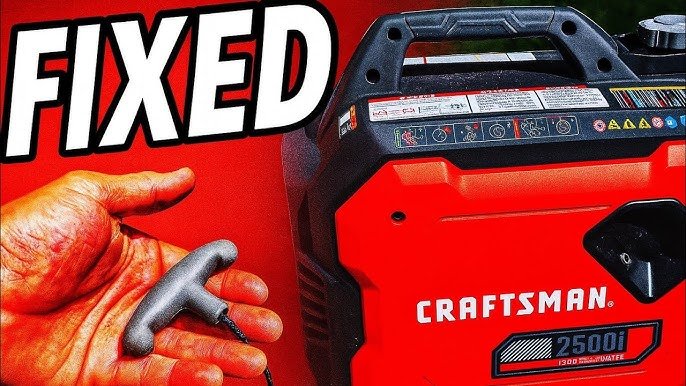
Is your generator acting up due to a damaged cable? You’re not alone.
Many people find themselves in this predicament, but don’t worry—help is at hand. Replacing a damaged generator cable might sound daunting at first, but with the right guidance, you can tackle it yourself. Imagine the satisfaction of fixing it on your own and saving money in the process.
This guide will walk you through each step, ensuring you have the confidence to handle the task with ease. So, roll up your sleeves and get ready to restore your generator to its full potential. Let’s dive into how you can safely and effectively replace that damaged cable.
Signs Of A Damaged Generator Cable
Visible wear and tearon a generator cable includes cracks, cuts, or frayed wires. These signs show the cable is weak and could fail soon. Check the cable’s insulation for any damage or discoloration. Exposed wires can cause shorts or shocks.
Electrical performance issuesoften appear as flickering lights or power loss. The generator might stop working properly or not start at all. Damaged cables can cause uneven power flow, which harms your devices.
Safety hazardsrise with damaged cables. Sparks, electric shocks, or even fires can occur. A faulty cable is dangerous for you and your equipment. Always inspect cables regularly to avoid accidents.

Credit: www.reddit.com
Tools And Materials Needed
Essential tools include wire cutters, screwdrivers, and a multimeter. These help in cutting, connecting, and testing wires. A utility knife is also needed to strip insulation safely.
Replacement cables must match the original size and rating. Use cables that can handle the generator’s power load. Check the cable’s insulation type for durability and safety.
- Gloves:Protect your hands from cuts and shocks.
- Safety Glasses:Shield your eyes from sparks and debris.
- Insulating Mat:Stand on this to avoid electric shocks.
Preparing For Replacement
Turn off the powerto the generator before starting any work. Unplug all connectionsto avoid electric shocks. Double-check that no power is flowing through the cables.
Clear the area around the generator. Make sure it is dry and well-lit. Remove any objects that could cause accidents or get in the way during replacement. Safety first.
Look over the generator carefully. Check for any signs of damage beyond the cable. Note any worn or broken parts. This helps decide if more repairs are needed.

Credit: www.youtube.com
Removing The Old Cable
Start by turning off the generator and unplugging it from power. Use a wrench to loosen the connectorsholding the cable. Be gentle to avoid damaging the connectors or generator parts.
After loosening, carefully detach the cablefrom the generator. Pull slowly to avoid hurting wires or connectors. If the cable is stuck, check for hidden screws or clips.
Dispose of the old cable properly. If the cable is damaged, do not throw it in regular trash. Take it to a recycling center or a hazardous waste facility. This helps protect the environment and keeps people safe.
Installing The New Cable
Start by running the new cable along the same path as the old one. Avoid sharp bends or tight twists to prevent damage. Keep the cable away from heat sources and moving parts.
Use cable clips or ties to hold the cable firmly in place. Make sure connections are tight and clean. Loose connections can cause sparks or power loss.
Check all connections with a tester before turning on the generator. This ensures the cable works properly and safely. If the test fails, recheck connections and cable routing.

Credit: generlinkcanada.ca
Safety Tips During Replacement
Avoid electrical shockby turning off power before starting. Use insulated gloves and tools to protect hands. Never touch wires with wet hands. Always check cables with a voltage tester to ensure no current flows.
Handle tools safelyby keeping them dry and clean. Use the right tool for each task to avoid slips or damage. Store tools properly after use to prevent accidents.
Ensure proper groundingto avoid electric shocks. Connect the generator cable to the ground wire securely. Check grounding connections before powering the generator. Grounding helps protect both you and the equipment.
Troubleshooting Common Issues
The generator cable may not power the generator due to loose connections. Check both ends of the cable for any loose or disconnected wires. Ensure all plugs are tightly connected to prevent power loss.
Cable overheatingcan cause damage or failure. Overheating happens if the cable is too thin for the generator’s power or if it is coiled tightly. Use a cable with the right thickness and keep it uncoiled during use to avoid overheating.
- Inspect all cable connections for firmness.
- Replace damaged plugs or connectors immediately.
- Use cables rated for your generator’s power output.
- Keep cables straight and avoid sharp bends.
Maintenance To Prevent Future Damage
Regular inspectionshelp spot damage early. Check cables for cracks, cuts, or wear. Look at connectors for rust or looseness. Inspect before and after use to catch problems.
Proper storagekeeps cables safe. Store cables in a dry, cool place. Avoid direct sunlight and moisture. Coil cables gently to prevent bends or kinks.
- Avoid pulling or stretchingcables during use.
- Keep cables away from sharp edgesthat can cause cuts.
- Do not place heavy objectson cables to prevent crushing.
- Use cable protectorsin high-traffic areas.
Frequently Asked Questions
How Do I Identify A Damaged Generator Cable?
Look for visible wear, cracks, or exposed wires on the cable. Check for unusual heat or burning smells. Test continuity with a multimeter to confirm damage. These signs indicate the cable needs replacement to ensure safety and proper generator function.
What Tools Are Needed To Replace Generator Cables?
You need wire cutters, electrical tape, a screwdriver, and a multimeter. Also, have replacement cables matching your generator’s specifications. Safety gloves and a voltage tester are essential to prevent electric shock during the process.
Can I Replace A Generator Cable Myself Safely?
Yes, if you follow safety guidelines and disconnect power first. Use insulated tools and wear protective gear. If unsure, consult a professional electrician to avoid injury and damage. Proper knowledge ensures a safe and effective cable replacement.
How Do I Choose The Right Replacement Cable?
Match the cable’s gauge, insulation type, and length to the original. Check your generator’s manual for specifications. Using the correct cable ensures optimal performance and safety during operation.
Conclusion
Replacing a damaged generator cable is safer and easier than it seems. Follow each step carefully to avoid risks and ensure good power flow. Use the right tools and materials for best results. Taking your time helps prevent mistakes and saves money.
Regularly check your cables to catch issues early. This keeps your generator working well for longer. Now you can handle cable problems with confidence and safety.