Imagine a stormy night, the power goes out, and you’re left in the dark. Now, picture having a standby generator that kicks in automatically, keeping your home warm and your fridge running.
Installing a standby generator can be a game-changer, providing peace of mind and security during unexpected outages. You may think it’s a daunting task, but with the right guidance, you can set it up smoothly and confidently. This guide will walk you through the installation process step by step, demystifying each part so you can ensure your home is never left powerless again.
Are you ready to take control of your power needs? Let’s dive into the details and empower your home today!
Choosing The Right Generator
Choosing the right generator involves assessing your power needs and space. Decide on a suitable location for installation. Ensure the area is level and accessible for maintenance.
Assessing Power Needs
Calculate the total power your home uses. Check your appliances and devices. Note how many watts each item needs. Add these numbers together. This helps find your power needs. Make sure to include things like lights and heaters. It’s important to get the numbers right. This way, you can choose the right generator.
Selecting Generator Type
Generators come in different types. Portable and standby are common options. Portable generators are small and movable. Standby generators are fixed and more powerful. Choose based on your space and needs. Standby is best for homes needing constant power. Portable is good for small needs and temporary use.
Considering Fuel Options
- Gasoline: Easy to find, but can be costly.
- Diesel: More efficient, but needs careful storage.
- Natural Gas: Clean and convenient, but requires a gas line.
- Propane: Long-lasting, but may require a large tank.
Choose a fuel type based on availability and budget. Check local availability before deciding. Each fuel has its pros and cons.

Credit: www.youtube.com
Preparing For Installation
Contact your local government office for permits. Permits are important for safety. They ensure your generator is installed correctly. Check rules and regulations in your area. This helps avoid future problems. Permits may take time, so apply early. Keep all paperwork organized and ready.
Choose a safe spot for the generator. It should be away from windows and doors. Keep it far from flammable items. The ground must be level and stable. Ensure the location is easy to access. This helps with maintenance and repairs.
Generators need good airflow to work well. Make sure there’s space around it. This prevents overheating. Avoid placing it in closed spaces. Fresh air keeps it running efficiently. Ventilation also protects against dangerous gases.
Gathering Required Tools And Materials
Ensure you have all essential tools like wrenches, screwdrivers, and measuring tape. Gather materials including the generator, cables, and fuel. Organizing these beforehand simplifies the installation process.
- Wrenchfor tightening bolts.
- Screwdriverto fix screws.
- Drillfor making holes.
- Voltage Testerto check electricity flow.
- Glovesto protect hands.
- Gogglesfor eye safety.
- Ear Protectionfor noise reduction.
- Helmetto guard the head.
| Material | Purpose |
|---|---|
| Copper Wire | Connects generator to panel. |
| Conduit | Protects wires. |
| Mounting Pad | Supports generator. |
| Fuel Supply | Powers the generator. |
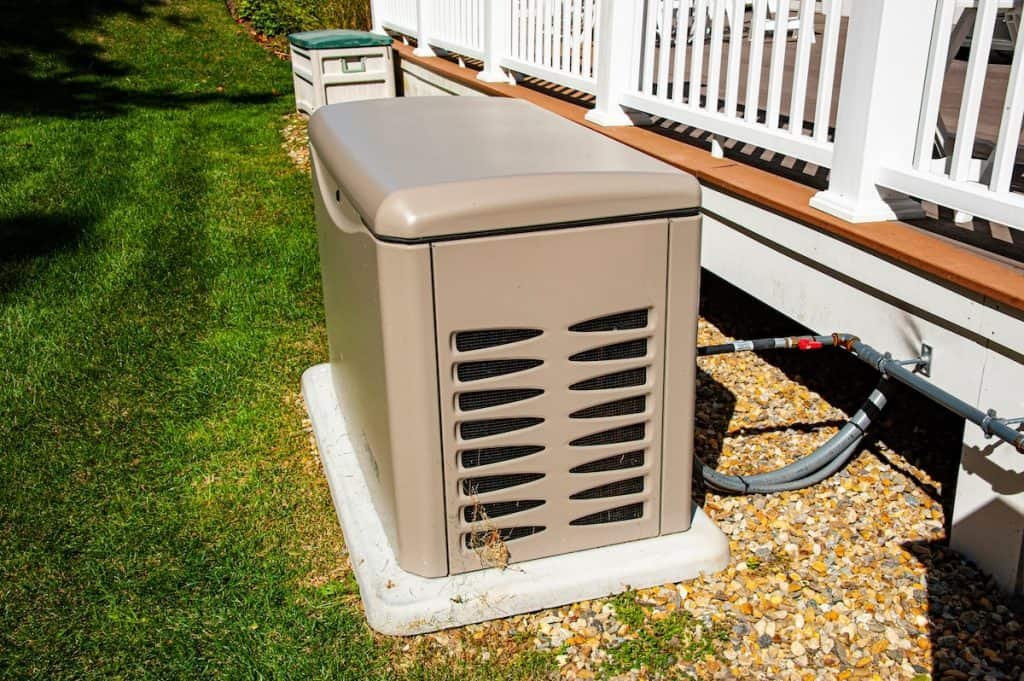
Setting Up The Foundation
Begin the setup by selecting a stable, level spot for the generator. Make sure it’s away from windows and doors. This placement ensures safety and reduces noise disturbance.
Building A Concrete Pad
Creating a strong base is very important. Concrete pads keep the generator steady. Start by measuring the area for the pad. The size should fit the generator. Mix the concrete well and pour it into the mold. Let it dry completely. A smooth surface is best for stability. This step ensures the generator stays in place.Positioning The Generator
Place the generator on the concrete pad. Make sure it is centered and balanced. Check for any uneven spots. Adjust if needed. Clearance around the unit is crucial. This helps with ventilation and access. Keep it away from windows and doors for safety.Securing The Unit
Use bolts to attach the generator to the pad. This prevents it from moving. Check the bolts are tight and secure. Weather protection is also necessary. Cover the unit with a generator enclosure. This keeps it safe from rain and debris. Proper securing extends the generator’s lifespan. `Connecting The Electrical System
Begin by ensuring safety. Turn off the main power supply before connecting the generator. Use a transfer switch to avoid backfeeding and ensure seamless power flow during outages.
Installing The Transfer Switch
The transfer switchconnects the generator to your home. It ensures safe power supply. First, turn off the main power. Then, mount the switch near the main panel. Use screws to secure it firmly. Connect wires from the switch to the panel. Follow the color codes carefully. This prevents electrical hazards. Always double-check connections for safety.
Running Electrical Wiring
Run wires from the generator to the transfer switch. Use heavy-duty cablesfor durability. Secure cables with clamps to avoid damage. Keep them neat and organized. Use a conduit for extra protection. This prevents wear and tear. Ensure wires are not too tight. This allows for flexibility.
Testing Electrical Connections
Test connections before using the generator. Turn on the generator first. Then, switch the transfer switch to generator power. Check if lights and appliances work. If they do, connections are correct. Listen for unusual noises. This could mean a problem. If unsure, call a professional for help.
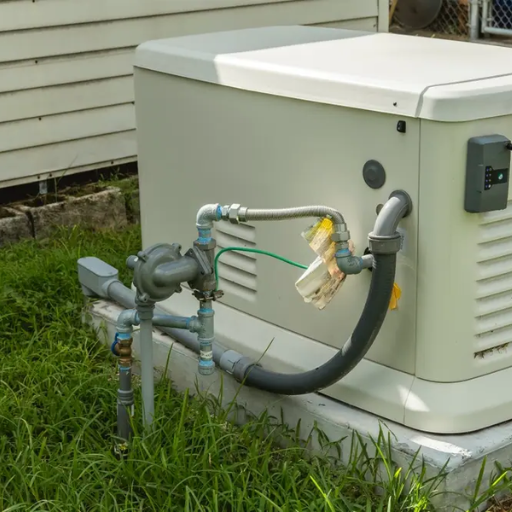
Connecting The Fuel Source
Ensure the generator is off and disconnected from all power sources. Check the fuel type, whether propane or natural gas, and securely connect the corresponding fuel lines to the generator. Verify connections are tight to prevent leaks and ensure a steady fuel supply for optimal generator performance.
Installing Fuel Lines
Fuel lines connect the generator to its fuel source. Use durable materials for long-lasting fuel lines. Check the fittings to ensure tight connections. Avoid kinks in the lines, as they block fuel flow. Secure the lines to prevent movement and damage.
Checking For Leaks
Leaks waste fuel and are dangerous. Inspect connections for any signs of leaks. Listen for hissing sounds around connections. Use soap solution to find leaks; bubbles will form at leaking spots. Repair leaks immediately to ensure safety.
Ensuring Proper Fuel Flow
Proper fuel flow is crucial for generator performance. Test the flow by starting the generator. Monitor fuel pressure; it should be steady. Adjust valves to maintain consistent flow. Check filters for blockages that may hinder fuel flow.
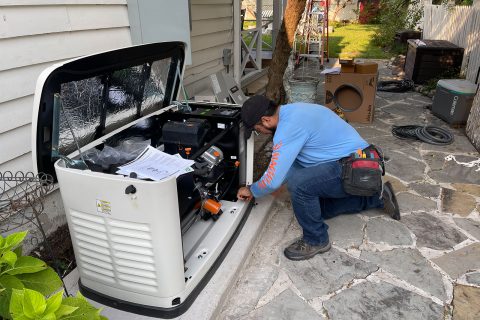
Performing Initial Startup
Performing the initial startup of a standby generator involves checking fuel levels and ensuring all connections are secure. Set the control panel and follow the manufacturer’s instructions to test the generator’s functionality. Regular maintenance checks ensure reliability during power outages.
Priming The Generator
Prime the generator to get it ready. Ensure all connections are tight. Check the fuel level and fill if needed. Press the primer button for a few seconds. This will help the generator start smoothly.
Starting The Engine
Turn the key or press the button to start the engine. Listen for any strange sounds. If the engine struggles, check the battery and connections. Make sure the choke is set correctly. Adjust until the engine runs smoothly.
Checking Operational Readiness
Once the engine runs, check all systems. Look for any warning lights. Observe the fuel gauge and oil levels. Test the power output with a small device. Confirm everything works as expected. If problems occur, consult the manual.
Credit: shgeneratorset.com
Testing And Maintenance
Start the generator. Listen for any strange noises. Ensure smooth operation. Check the voltage outputusing a meter. Confirm if lights and appliances work. Observe the fuel level. Don’t let it run out. Let it cool before shutting down. Repeat monthly for assurance.
- Check oil levels and refill if needed.
- Inspect air filters for dirt.
- Look at battery connections.
- Examine coolant levels carefully.
- Lubricate moving parts to prevent wear.
Identify if the generator is not starting. Check the fuel supply. Ensure the battery is charged. Look for loose wires. Listen for unusual sounds. Tighten screws if needed. Seek professional help for major issues.
Safety Tips And Best Practices
Ensure the generator is on a stable surface and away from windows. Follow manufacturer’s guidelines for safe installation. Use a transfer switch to connect the generator to your home, reducing the risk of back feed.
Avoiding Carbon Monoxide Risks
Always place the generator outside. Carbon monoxide is very dangerous. Keep it far from windows and doors. Never use it inside a garage or basement. Use carbon monoxide detectors in your home. Stay safe and breathe fresh air.
Ensuring Electrical Safety
Use a transfer switch to connect the generator. It prevents backfeeding and protects the grid. Make sure cables are in good condition. Avoid using damaged or worn-out cords. Keep them dry to prevent shocks. Hire a professional for complex installations.
Emergency Preparedness
Have enough fuel stored safely. Check the fuel level before starting. Keep spare parts handy, like filters and spark plugs. Test the generator monthly. It ensures readiness during a real emergency. Create a family emergency plan. Practice it regularly.
Credit: greatbrotherelectrical.com
Frequently Asked Questions
Can I Install My Own Standby Generator?
Installing a standby generator requires electrical and plumbing skills. Hiring a licensed professional ensures safety and compliance with local codes. Improper installation can lead to hazardous situations. It’s best to consult with an expert to avoid potential risks and ensure efficient operation of the generator.
Can I Install A Generac Generator Myself?
Installing a Generac generator yourself is not recommended. Professional installation ensures safety and compliance with local codes. Electricians ensure proper setup and functionality. DIY installation risks include incorrect wiring and potential hazards. Always consult a certified technician for installation assistance.
How Much Does It Cost To Install A Generac Standby Generator?
Installing a Generac standby generator typically costs between $3,000 and $5,000. Prices vary based on size, installation complexity, and location. Additional costs may arise for permits, electrical work, and site preparation. Always consult with a certified installer for precise estimates tailored to your specific needs.
How Do You Connect A Standby Generator To Your House?
Hire a licensed electrician. Install a transfer switch. Connect the generator to the transfer switch. Test the system. Follow local codes and safety guidelines.
Conclusion
Installing a standby generator ensures power during outages. It brings peace of mind. Follow safety guidelines to prevent accidents. Consult a professional for complex steps. Regular maintenance keeps your generator ready. Check connections and fuel levels often. A reliable generator offers comfort and security.
It’s a smart investment for any home. Enjoy continuous power when you need it. With proper care, your generator lasts long. Don’t wait for an emergency to install one. Stay prepared and keep your household running smoothly. Your family will thank you during the next power outage.